

Weeklong Project 2020: Design Your Own Board Game!
A maker challenge full of fun and possibilities!
Welcome to our Weeklong Project, makers! On this page you will find everything you need to design and create your very own board game! It is a lot of stuff, so here is a table of contents you can click through if you don’t feel like scrolling or are having trouble finding what you are looking for.
Table of Contents
Instructor Karissa walks you through the what, how, why, and when of our Weeklong Project: Design Your Own Board Game!
Project Summary & Goals
What is better than having fun while making something awesome? Making something awesome that can be used to make more fun!
Creating a Board Game is one of our favourite Mindful Makers projects because…
The possibilities for what your game will become are absolutely endless.
You get to use nearly every skill, material, and tool in your Maker Essentials Tool Box.
You get to devote as much time to creating and improving your game as you’d like!
Over the course of the week (or however long you decide to work on your game), you are only limited by your imagination, creativity, and resourcefulness.
We also love this project because it is a perfect opportunity to practice being a Mindful Maker who plans their work and considers how the things they create will be used while they are creating them.
These instructions will help you:
Think about ideas for your very own Board Game
Learn some strategies to bring the ideas to life
Test your ideas
Improve your creation to make something even better than you imagined!
We have provided everything you may need to create a basic game, that we are calling a Level 1 Board Game. You might not use everything, though! This project can be as simple or as complicated as you want it to be. For some more explanation, please watch our introduction video below!
Then read on to see more details and written guidance to help you along during your week full of Mindful Making!
Materials
For A Level 1 Board Game You May Need:
Other decorating Materials: Coloured Markers, Crayons, Pencil Crayons
Black Fine Tip Marker or Pen
Masking Tape
Brown Paper Tape
Glue Stick (Hot Glue is Optional)
Butterfly Pins
Binder clips and/or paper clips
Button or a Large Bead & Twist Ties (Optional)
Sandwich Bags, Boxes or Containers for Storage (Optional)
Cardboard
(flattened corrugated cardboard boxes work well, but cereal or cracker boxes are also good!)
Cardboard Saw (& Straight Edge for Cutting)
Cardstock
Pencil and Eraser
Pokey Tool
Ruler
Scissors (A Paper Cutter is Optional)
Paint
Scrap paper or a drop cloth to protect your work surface
optional Materials that might help take your game to the Next Level:
Throughout these instructions, there are a lot of chances for you to be creative and experiment with ideas that take your board game to new levels of awesomeness!
Other materials you might find around your house and want to use for these ideas may include (but are not limited to):
String, small objects or toys, paper or plastic cups, straws, marbles, bottle caps, popsicle sticks, rubber bands… ANYTHING you can think of, find, and get permission to use.
“Creating something with endless possibilities can be scary or overwhelming. When it can be ANYTHING how do you know where to start or what material is best to use?
Design Thinking helps by reminding you that you can always look back to move forward.
Trouble coming up with ideas? Go back to looking at things that inspire you. Not feeling inspired? Talk to others about what they like, think and feel about the thing you are creating. Empathy is a tool that always helps me get unstuck!”
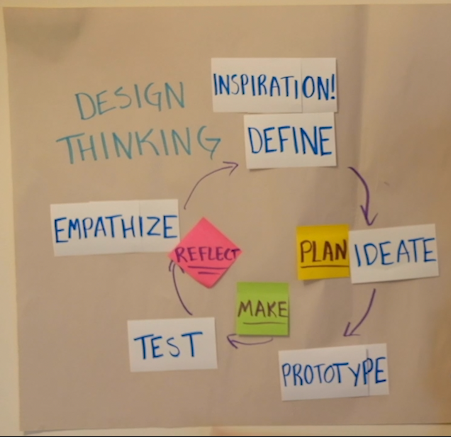
You can see more about Design Thinking in our intro video, and in the instructions below.
Process
This project is divided into 6 Phases to help you break up your work, manage your time, and work through the Design Thinking process successfully!
Keep in mind, you don’t have to finish your board game in one week. You can take less time if you are excited and work through each phase quickly OR you can even take more time and continue Phase 6 into the future. You might even play your game for a while and decide to Reflect & Make it Better a month or two down the road.
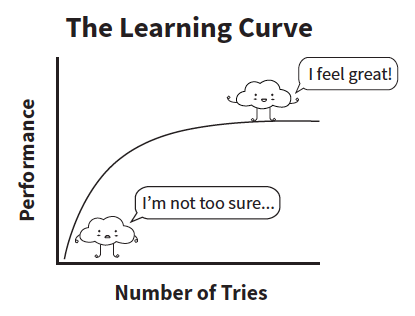
Remember, you are still on the journey of a Learning Curve! Be kind to yourself and enjoy the ride.
“This project is meant to be fun and an opportunity for you to experiment and apply your Mindful Maker skills.
If you find yourself feeling frustrated, stuck, or down at any point: take a break and do something you enjoy. When you are feeling calmer, take a Mindful Moment to think about why you felt that way, and how you can work through things and move forward! ”
Let’s Get Making!
Click on the Phase Title below to jump to that section, or scroll down.
We also have some important instructions to keep in mind for every phase of the project, and some additional tips for how to take your game to the next level if you want to do more than the level one guidelines for the project.
Phase 1: Get Inspired!
Step 1: Look Through our instruction photos and our DIY Board Game Gallery
We have tried to give you a lot of examples and visuals* to help you through the design process.
Explore ALL of this page’s content, then explore again! Look at the pictures and watch the videos. Read the text as much as you can too! Don’t worry about reading it all at once! Take your time, and take breaks. As you work your way through the content, we hope you will find all of the information you need.
*The photos used in these instructions are from the design and creation process of two board games: Garden Race, and Mountains and Sea. You can see more about these games, and others, in our DIY Board Game Gallery at the bottom of this page. Scroll down or click the button below.
Step 2: Browse other sources of inspiration
LOOK AROUND YOUR HOME — Do you have some games you enjoy? Are there certain activities you love doing, books or movies you enjoy, or toys you love playing with? These things can give you hints about a theme to base your game around later!
TALK WITH PEOPLE YOU ADMIRE — Don’t forget about empathy as a powerful tool when designing something for people to use!
BROWSE ON PINTEREST, SEARCH ON GOOGLE — “Create your own board game” and “DIY board game” give some good results and imagery to kickstart your Maker Brain.
REFLECT ON YOUR PAST EXPERIENCES — What did you like about board games you have played? What did you dislike? This can give you some ideas about what to include and what to avoid in your design.
Step 3: Note down your thoughts and reflections!
The goal is to keep a handy collection of all of the things that inspire you!
Create your Inspiration Notes however works best for you. This can take many forms:
a mix of writing and doodling on paper,
a collage of images and ideas,
a slideshow or word document where you paste in things you found online, etc.
*THIS STEP FLOWS DIRECTLY INTO PHASE 2: IDEA TIME. Where you will use these inspirations to build your own ideas!
Phase 2: idea time!
Step 1: A Great Big Brainstorm
The most important rule about Ideation is: THERE ARE NO BAD IDEAS!
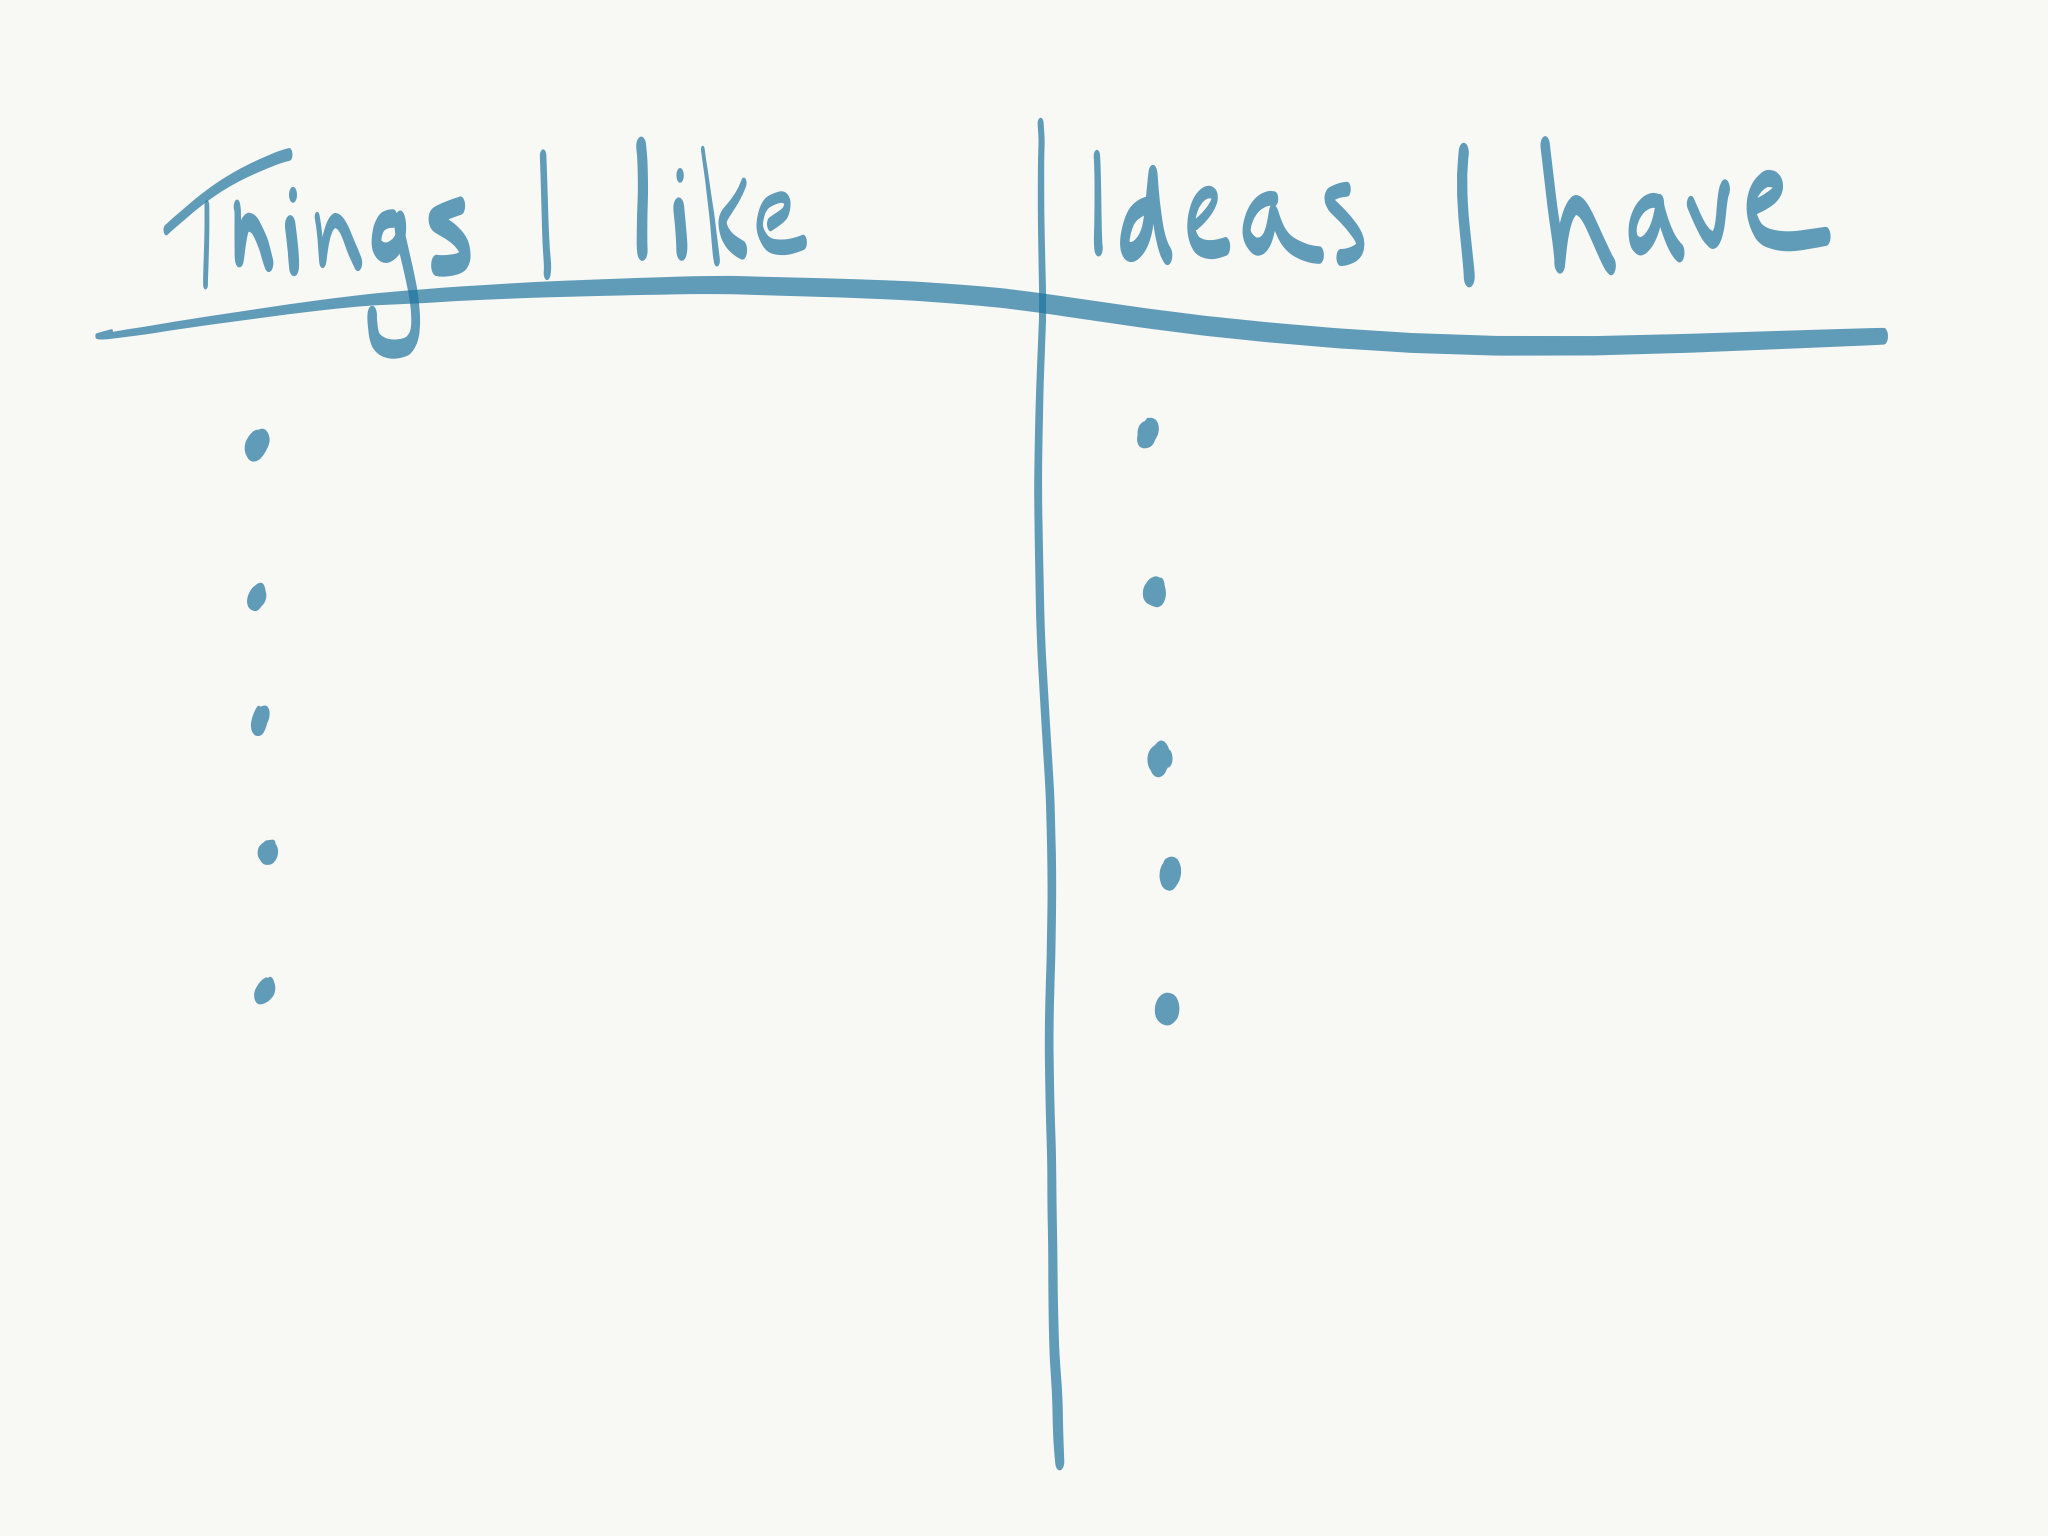
In this step, we suggest you get a sheet of paper or a notebook and your favourite writing tool, and then divide your page into two columns: “Things I like.” and “Ideas I have.”
Then, give yourself at least 10 Minutes to write down everything you can think of that you like or were inspired by, and any ideas for your own game that happen to come up. YOU ARE NOT DECIDING YET!
At this stage, encourage WILD ideas. Ideation is the time to dream big, you can edit down your ideas in Phase 3: Planning & Prototyping
When you are Ideating, try to write down as many things as you can think of. The more ideas you have to look at, mix and match together, and build upon… the easier your decision making and planning will be later!
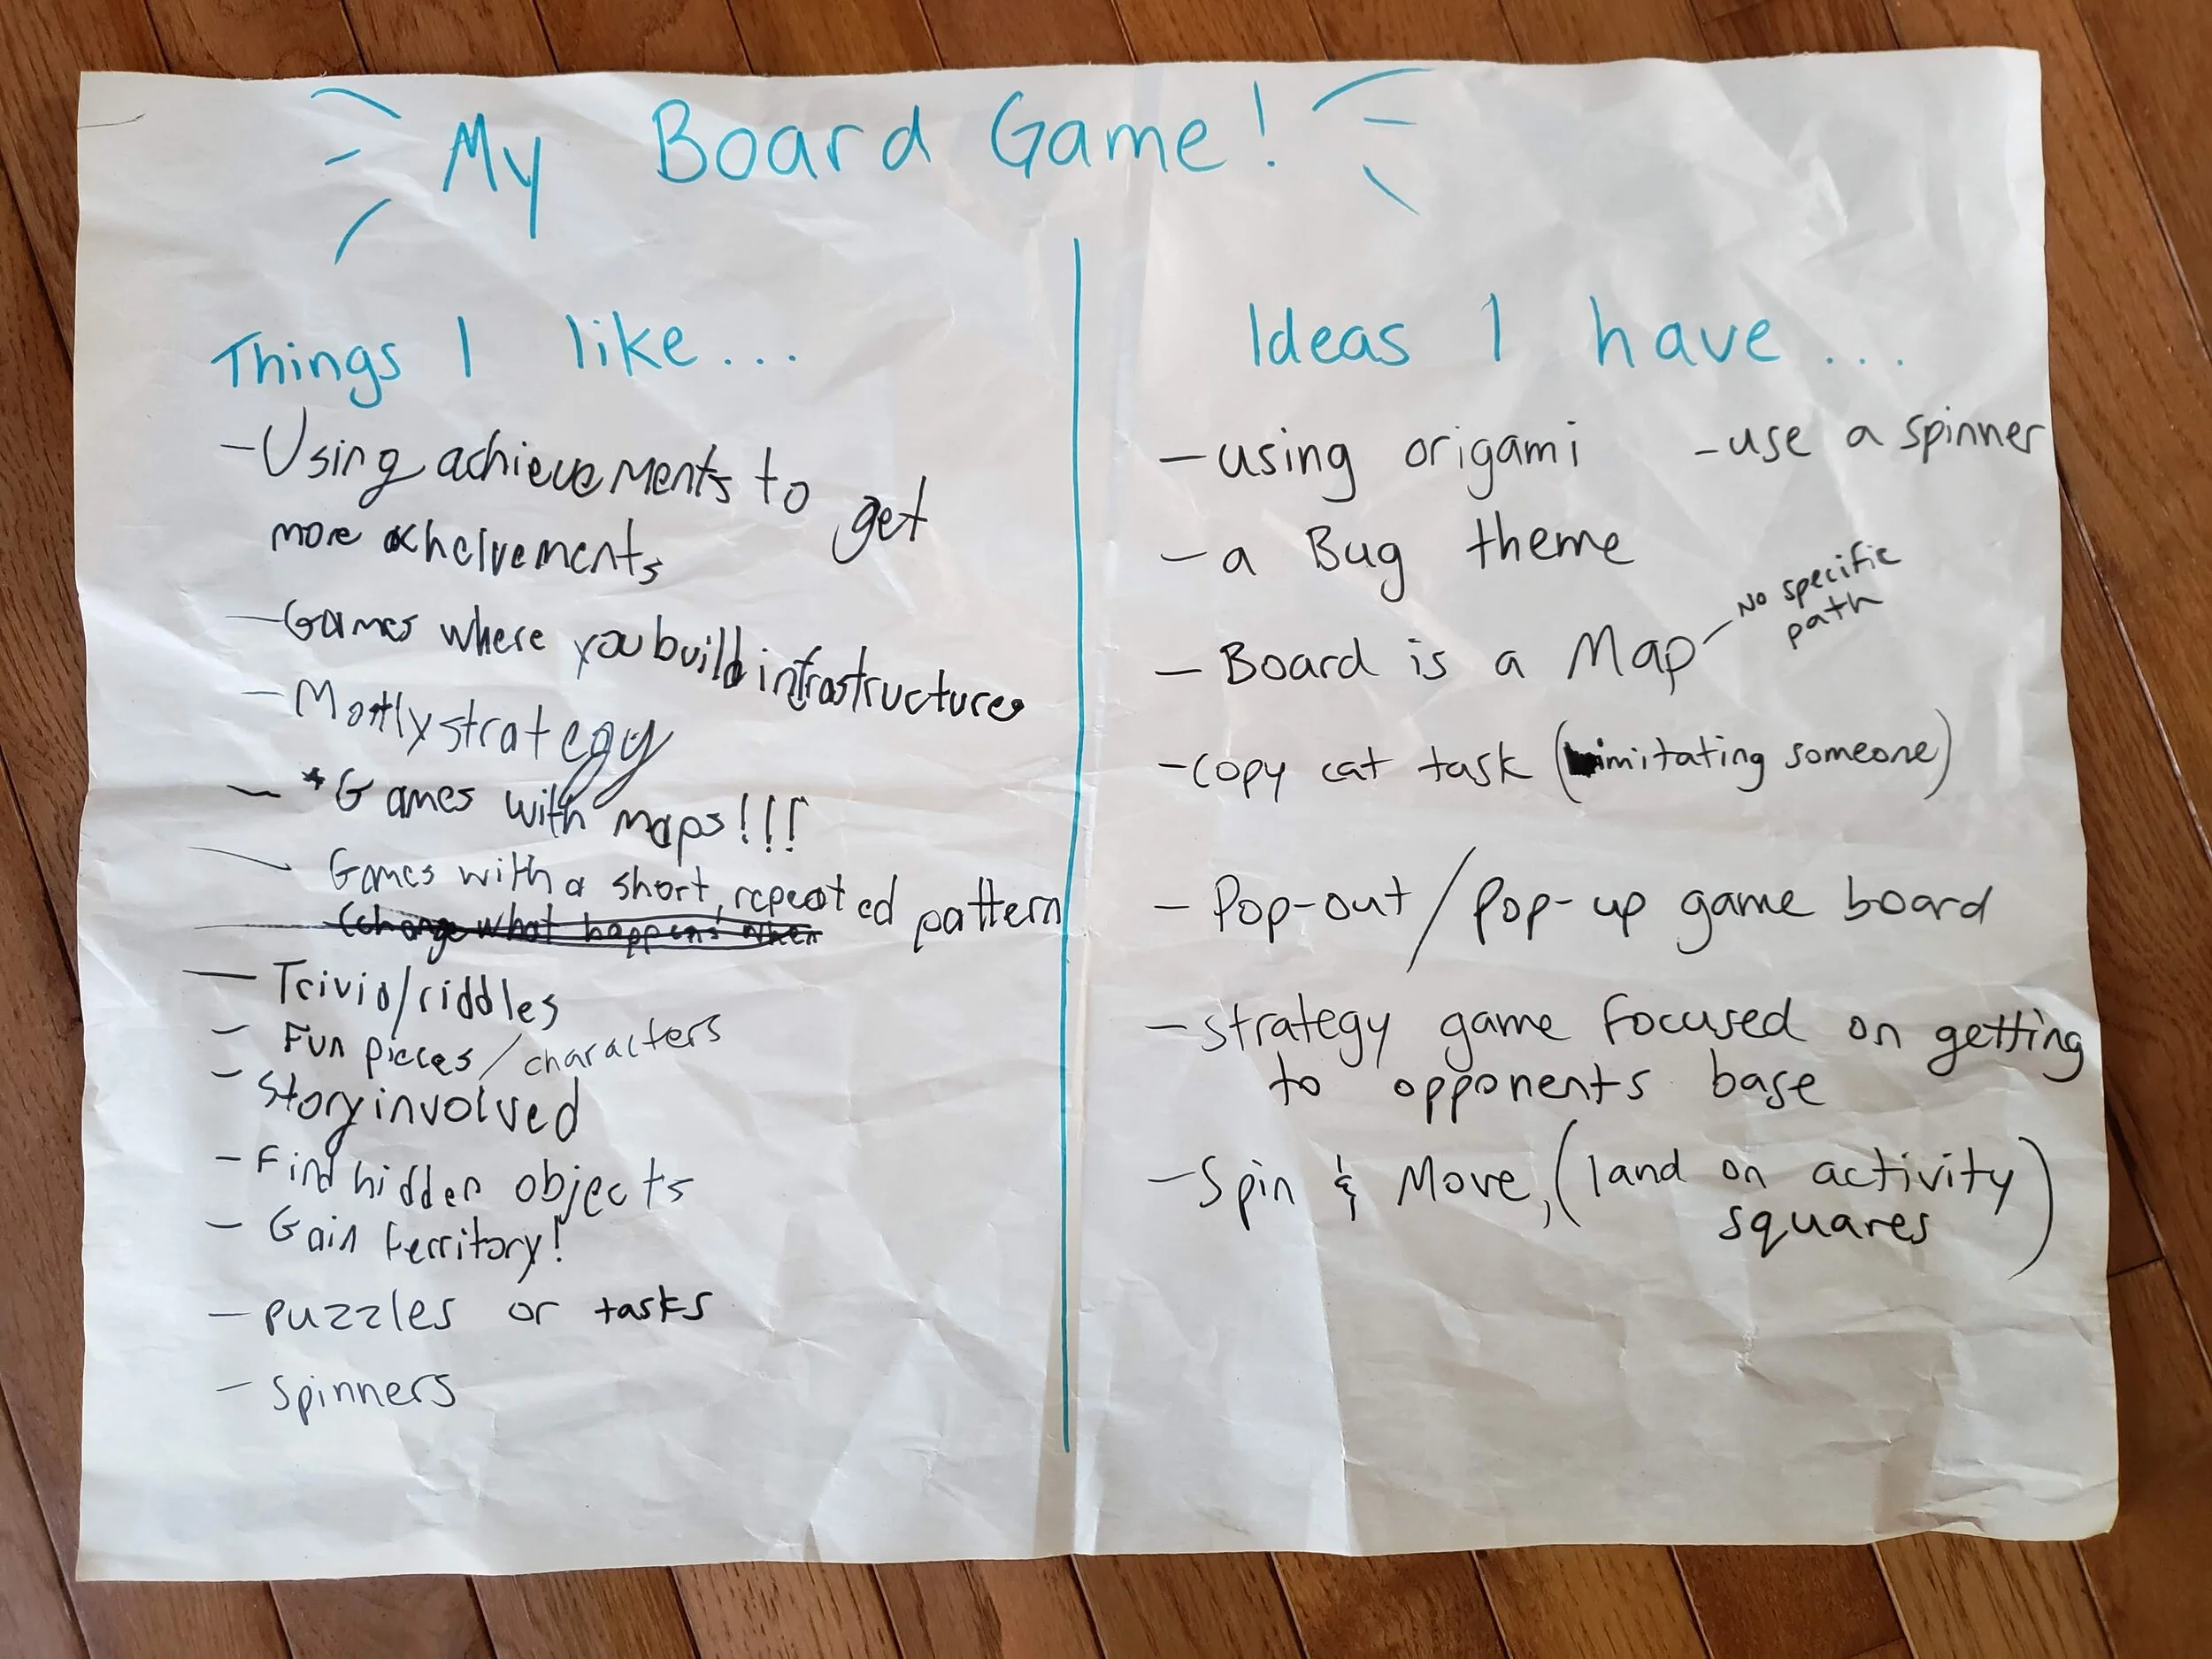
This is how some Mindful Makers (Phil, Sam, and Nate) wrote down all of their inspiration and ideas before they made decisions about their Board Games. In the following phases, these inspirations and ideas turned into TWO different games: Mountains & Sea, and Garden Race.
Phase 3: PLAN & PROTOTYPE!
One of the most important things about Design Thinking, is practicing communicating your ideas. While you are planning, here are two suggestions for how to keep your ideas organized, and be able to review or change them easily as you continue through the design process.
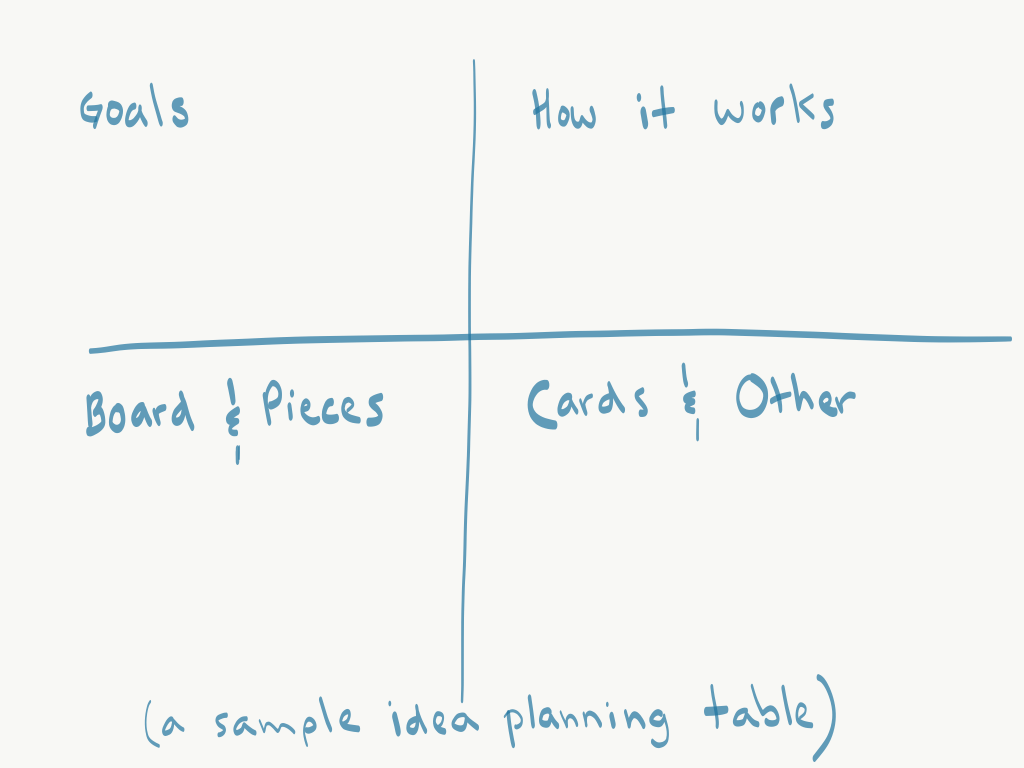
A Chart or Table is a super easy way to organize your thoughts. All you need is some paper and a writing tool of any size!
You can also easily make one on your computer if you prefer to work digitally! Slideshows and Word Documents both work really well for this.

A Mind Map is one of the most popular ideation and planning tools for Designers and Creatives around the world.
You can organize it however makes the most sense, and helps you think. These maps often become a little messy looking but that is part of the beauty! You are literally mapping out your thoughts!
STEP 1: GAME GOALS
Now that you have some great visual records of your inspirations and ideas, it is time to get your Maker Brain into Planning mode! This phase is where the decision making starts to happen.
This means you are going to define the features and details of your game a little more. The best place to start is with the Objective or Goal of the Game:
What do you want players to DO or to WORK TOWARD while they are playing your game?
You can also take this time to plan some of your Personal Goals for the project:
What do you want to practice, learn, try or do while you are making your board game?
If you feel stuck: make use of your two most important tools for coming up with ideas — EMPATHY and INSPIRATION
TALK TO SOMEONE about some of your ideas and see if they have any feedback. Maybe ask them what their favourite games are, and why they like them. Or you can even show them your chart or mind map full of ideas and see what they have to say!
LOOK AT YOUR OWN INSPIRATIONS again, and see if they spark anything new.
Which board game inspirations do you get most excited about? Reflect on why that is. Do you like the theme? The colours? The in-game activities?
What interests do you have that you could use to help shape a theme? Making a game that is based around something you already enjoy and know about is a SUPER smart idea!
Step 2: The Game Board
Sketch out any ideas that you may have from the previous phase (if you haven’t already done so)
Think about the path that you want players to take as they play the game.
This also includes thinking about the possible layouts of add ons if you want them! These might include:
A place to store game cards
Pop-up elements or props
Special squares or spaces
Scout out possible materials for you game board
Remember, you need to source your own cardboard, bristol board, or another large and fairly sturdy material to use as your game board base
Measure and Prototype possible sizes and shapes for your gameboard
Once you have some ideas for what you might be able to use to create your game board, start thinking about size.
Your material supply does limit what you can make in terms of size, but keep in mind that a larger game board doesn’t mean it is better! It totally depends on how you design the rest of the game.
Knowing your size restrictions ahead of time really helps with planning all of the other features!
For example, a smaller board just means you need to create or find smaller items to use as pieces, or maybe introduce some elements to help make playing the game take more time down the line.
Here are some Sample Board Game Layout Sketches


As you are planning the layout and size you want, it is a great time to try PAPER PROTOTYPING
This means making a sample of your idea, with scrap or spare materials that you don’t mind making mistakes with
Easy to find materials like newsprint, scrap or recycled paper, and old cereal boxes might be helpful here.
You will need some writing tools to sketch out and visualize your ideas with your prototype.
Sticky Notes or smaller pieces of paper are useful because you can move ideas around to test your plan without worrying about glueing or taping them down too securely.
Masking tape is a designer’s best friend when it comes to prototyping as well! You can attach things in a less permanent way. Or maybe even break out your Tapigami skills to prototype features.
Cut out and tape together your prototyping materials as needed to create mockups or draft versions of your game board
Keep these prototypes handy because you can also test and check the size of your player pieces on the board using a similar method!
Step 3: Player Pieces
Planning and prototyping your game board is very connected to thinking about and testing ideas for player pieces as well.
While you are material scouting also keep an eye out for small objects that might come in handy when making game pieces. These might include things like:
bottle caps
crafting materials like large beads or stones, pom poms, pipe cleaners, etc.
paperclips or clothespins
small toys or objects that you have collected (and have permission to use)
Items from nature like small rocks or shells
If you are stuck: Look back at your Goals, Ideas and Inspiration Notes to see what might help you imagine what your player pieces could be.
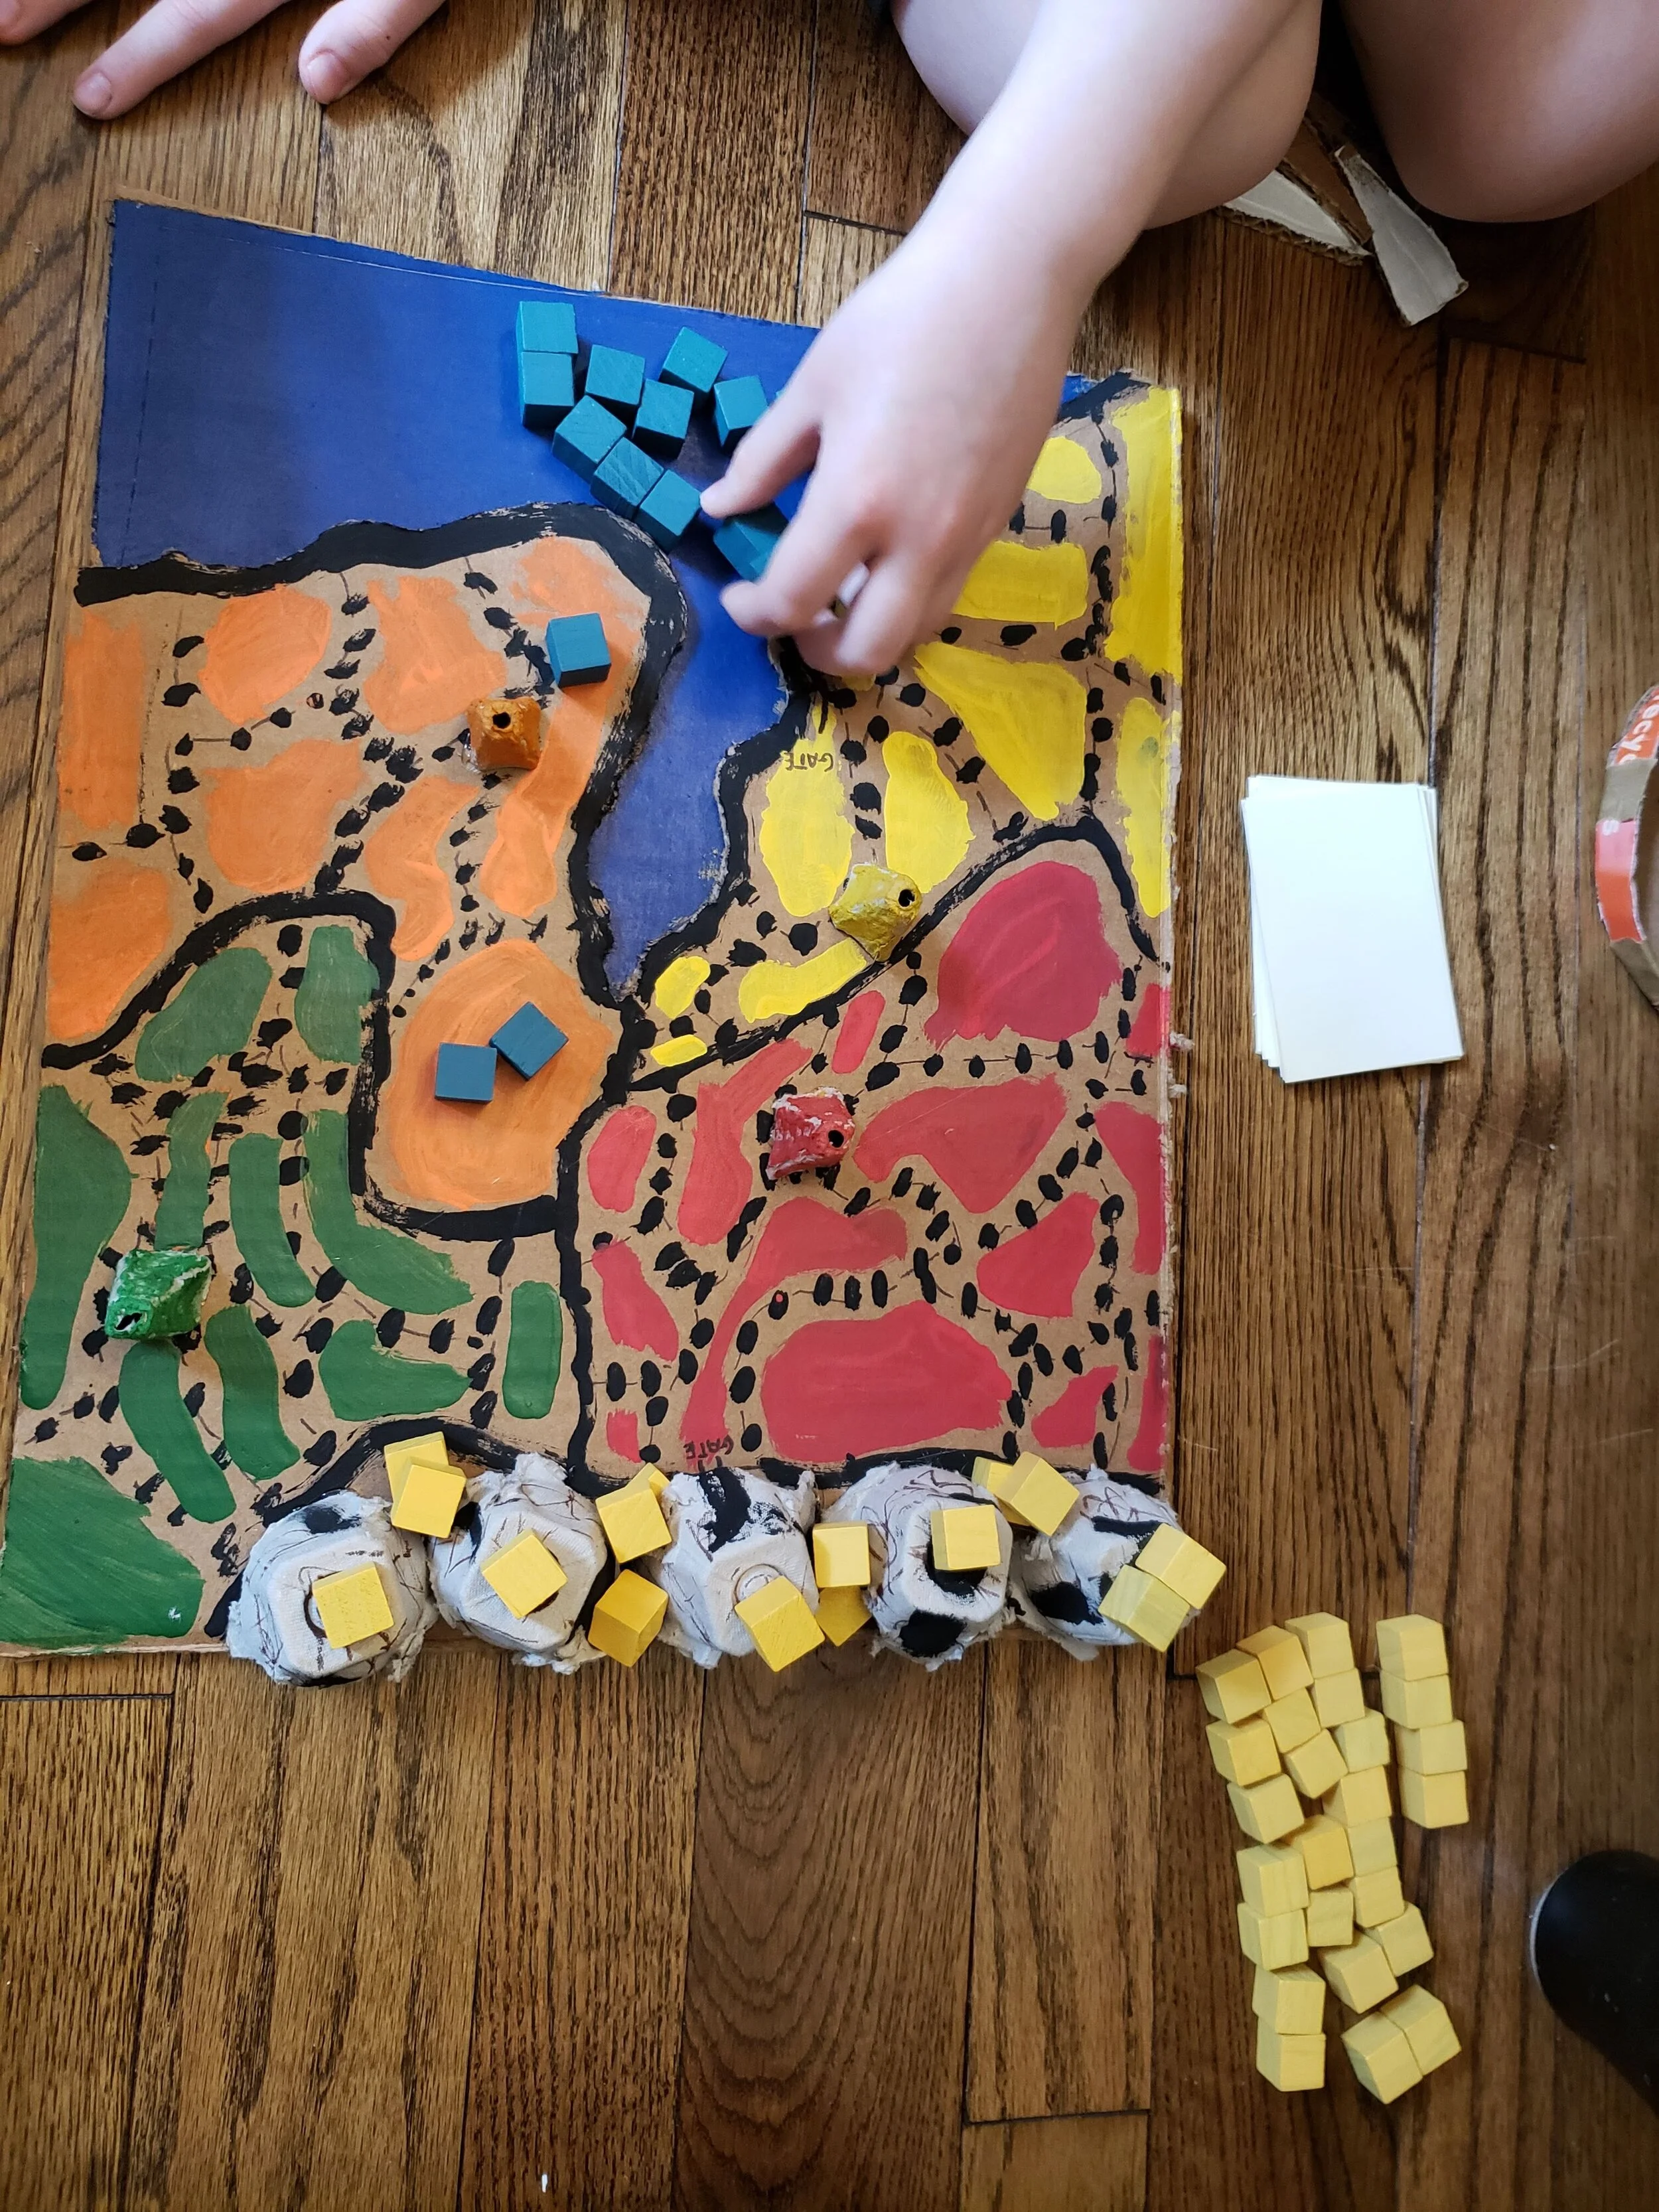
Do you want them to be characters like the origami insects in Garden Race? Or more functional like the small block soldiers in Mountains and Sea?


Step 4: How it Works!
This is the part where your ideas and plans will start to come to life! It is also where your creativity and uniqueness can shine the brightest.
Reminder: what you decide to make in this planning and prototyping stage does NOT have the be the Final Version of your game!
The whole point of planning, prototyping, practicing, and testing (which you will do later) is to help you think of new ideas, identify the things that you want to change, and make your game even better in the end!
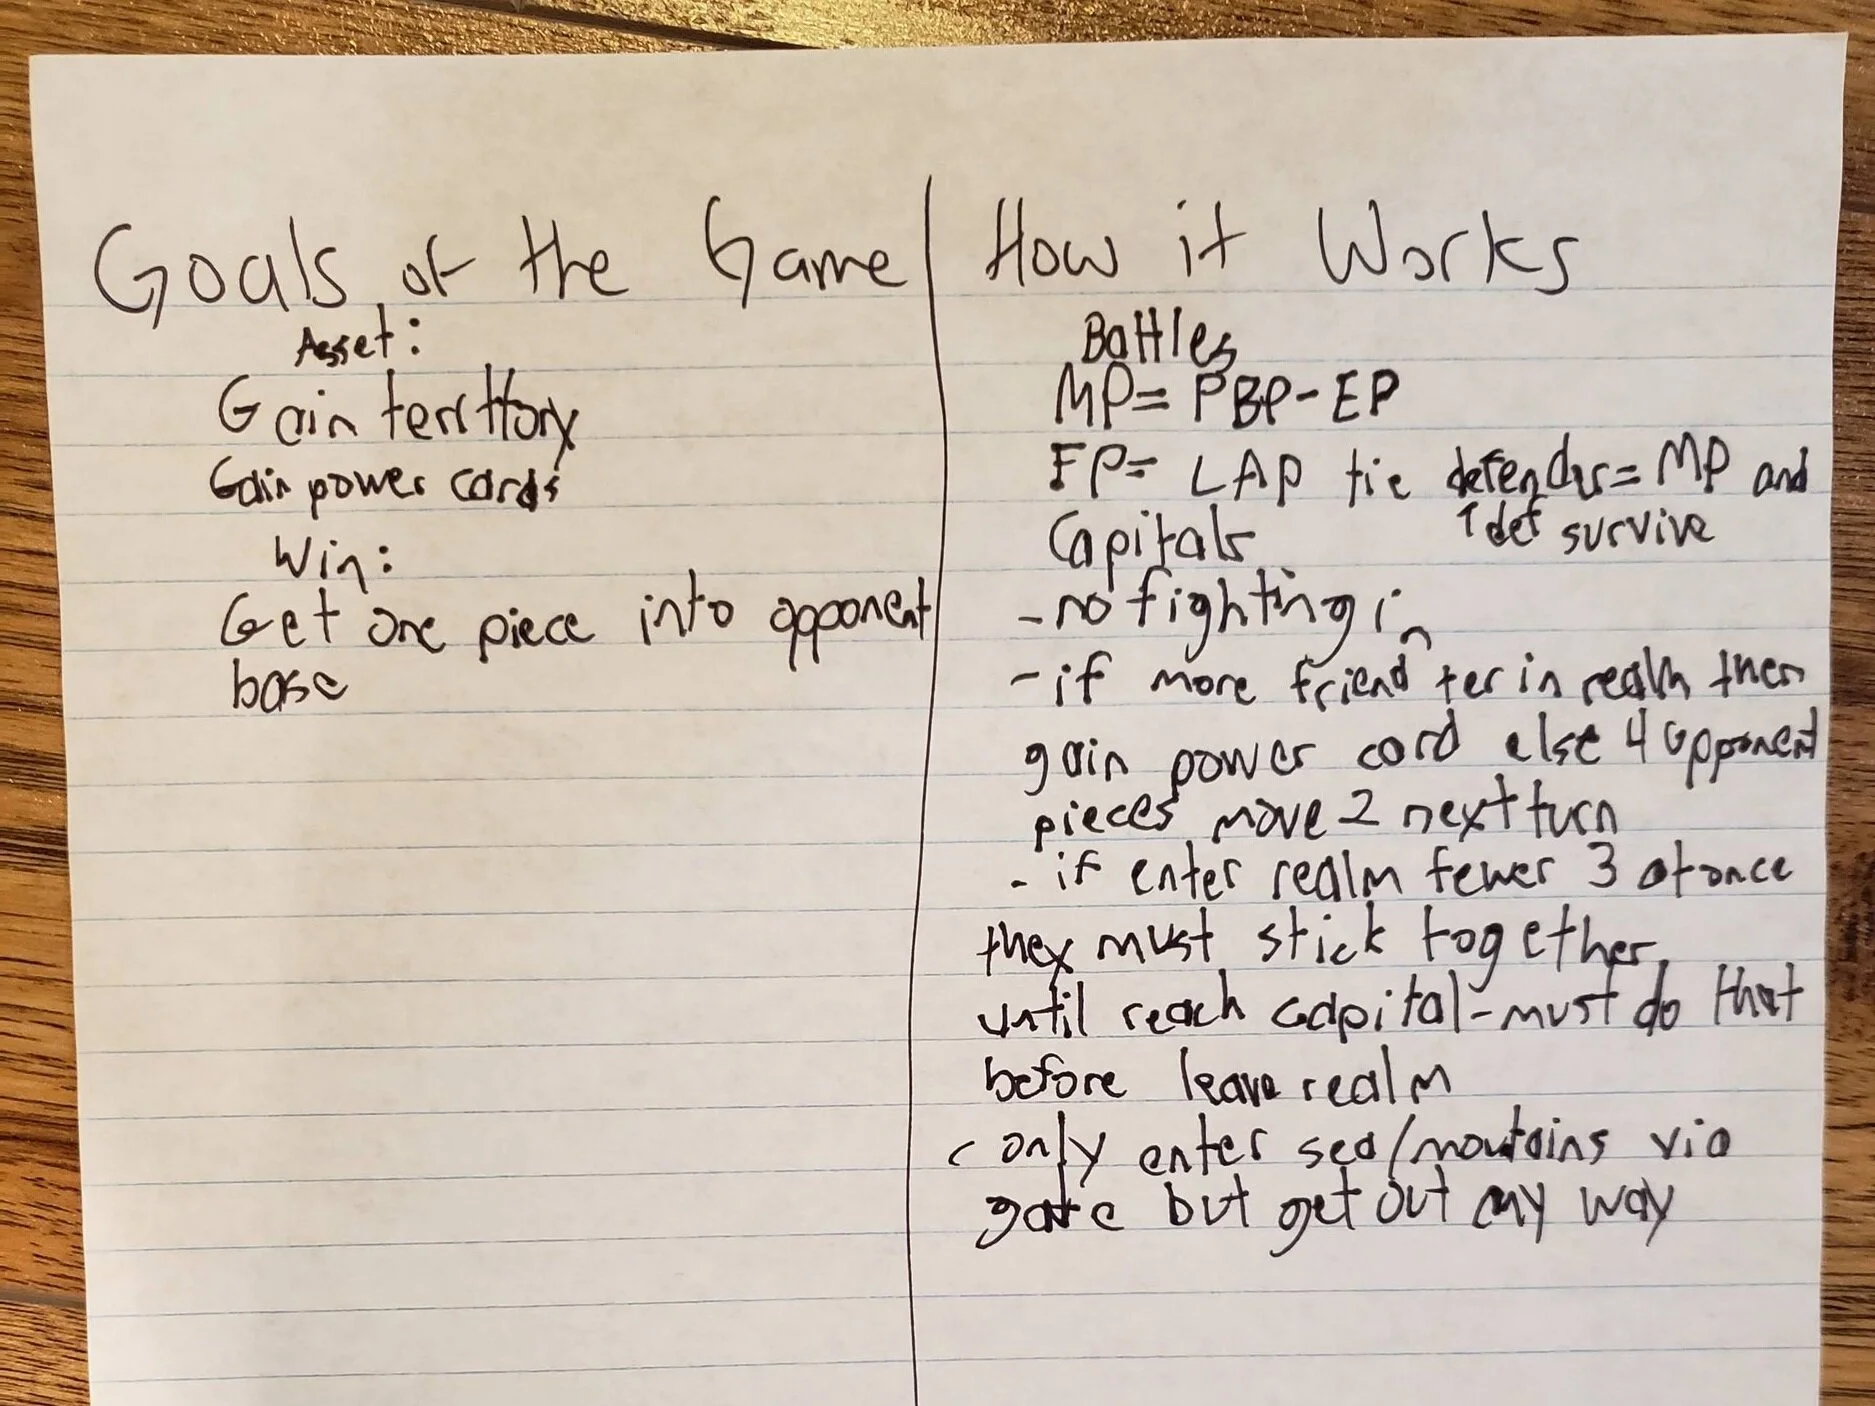
This Simple Planning Table was what Phil found most helpful when he was planning and prototyping his ideas for Mountains and Sea. He also made sketches of his possible board game layouts.
We can’t tell you how to design the mechanics of your game, or how it works. But here are some guiding questions to help you in your thinking and planning:
Is there a story or key goal for the players to work through?
How many players do you want your game to allow? Can people play in pairs or on teams?
What happens at the start of the game?
What happens when a player takes a turn?
How do players know how to move along the path on your game board? Are you using dice? A spinner? Something else?
Do you need any special squares for players to land on? If so, what do these squares do?
Some common special squares actions include things like: Draw a card, Go to another special square like a (jail or a checkpoint), Pay a specific amount in tokens or fake money, Lose a turn, etc.
How does someone win the game? Does the game end as soon as a player completes this task, or does continue until all players are finished?
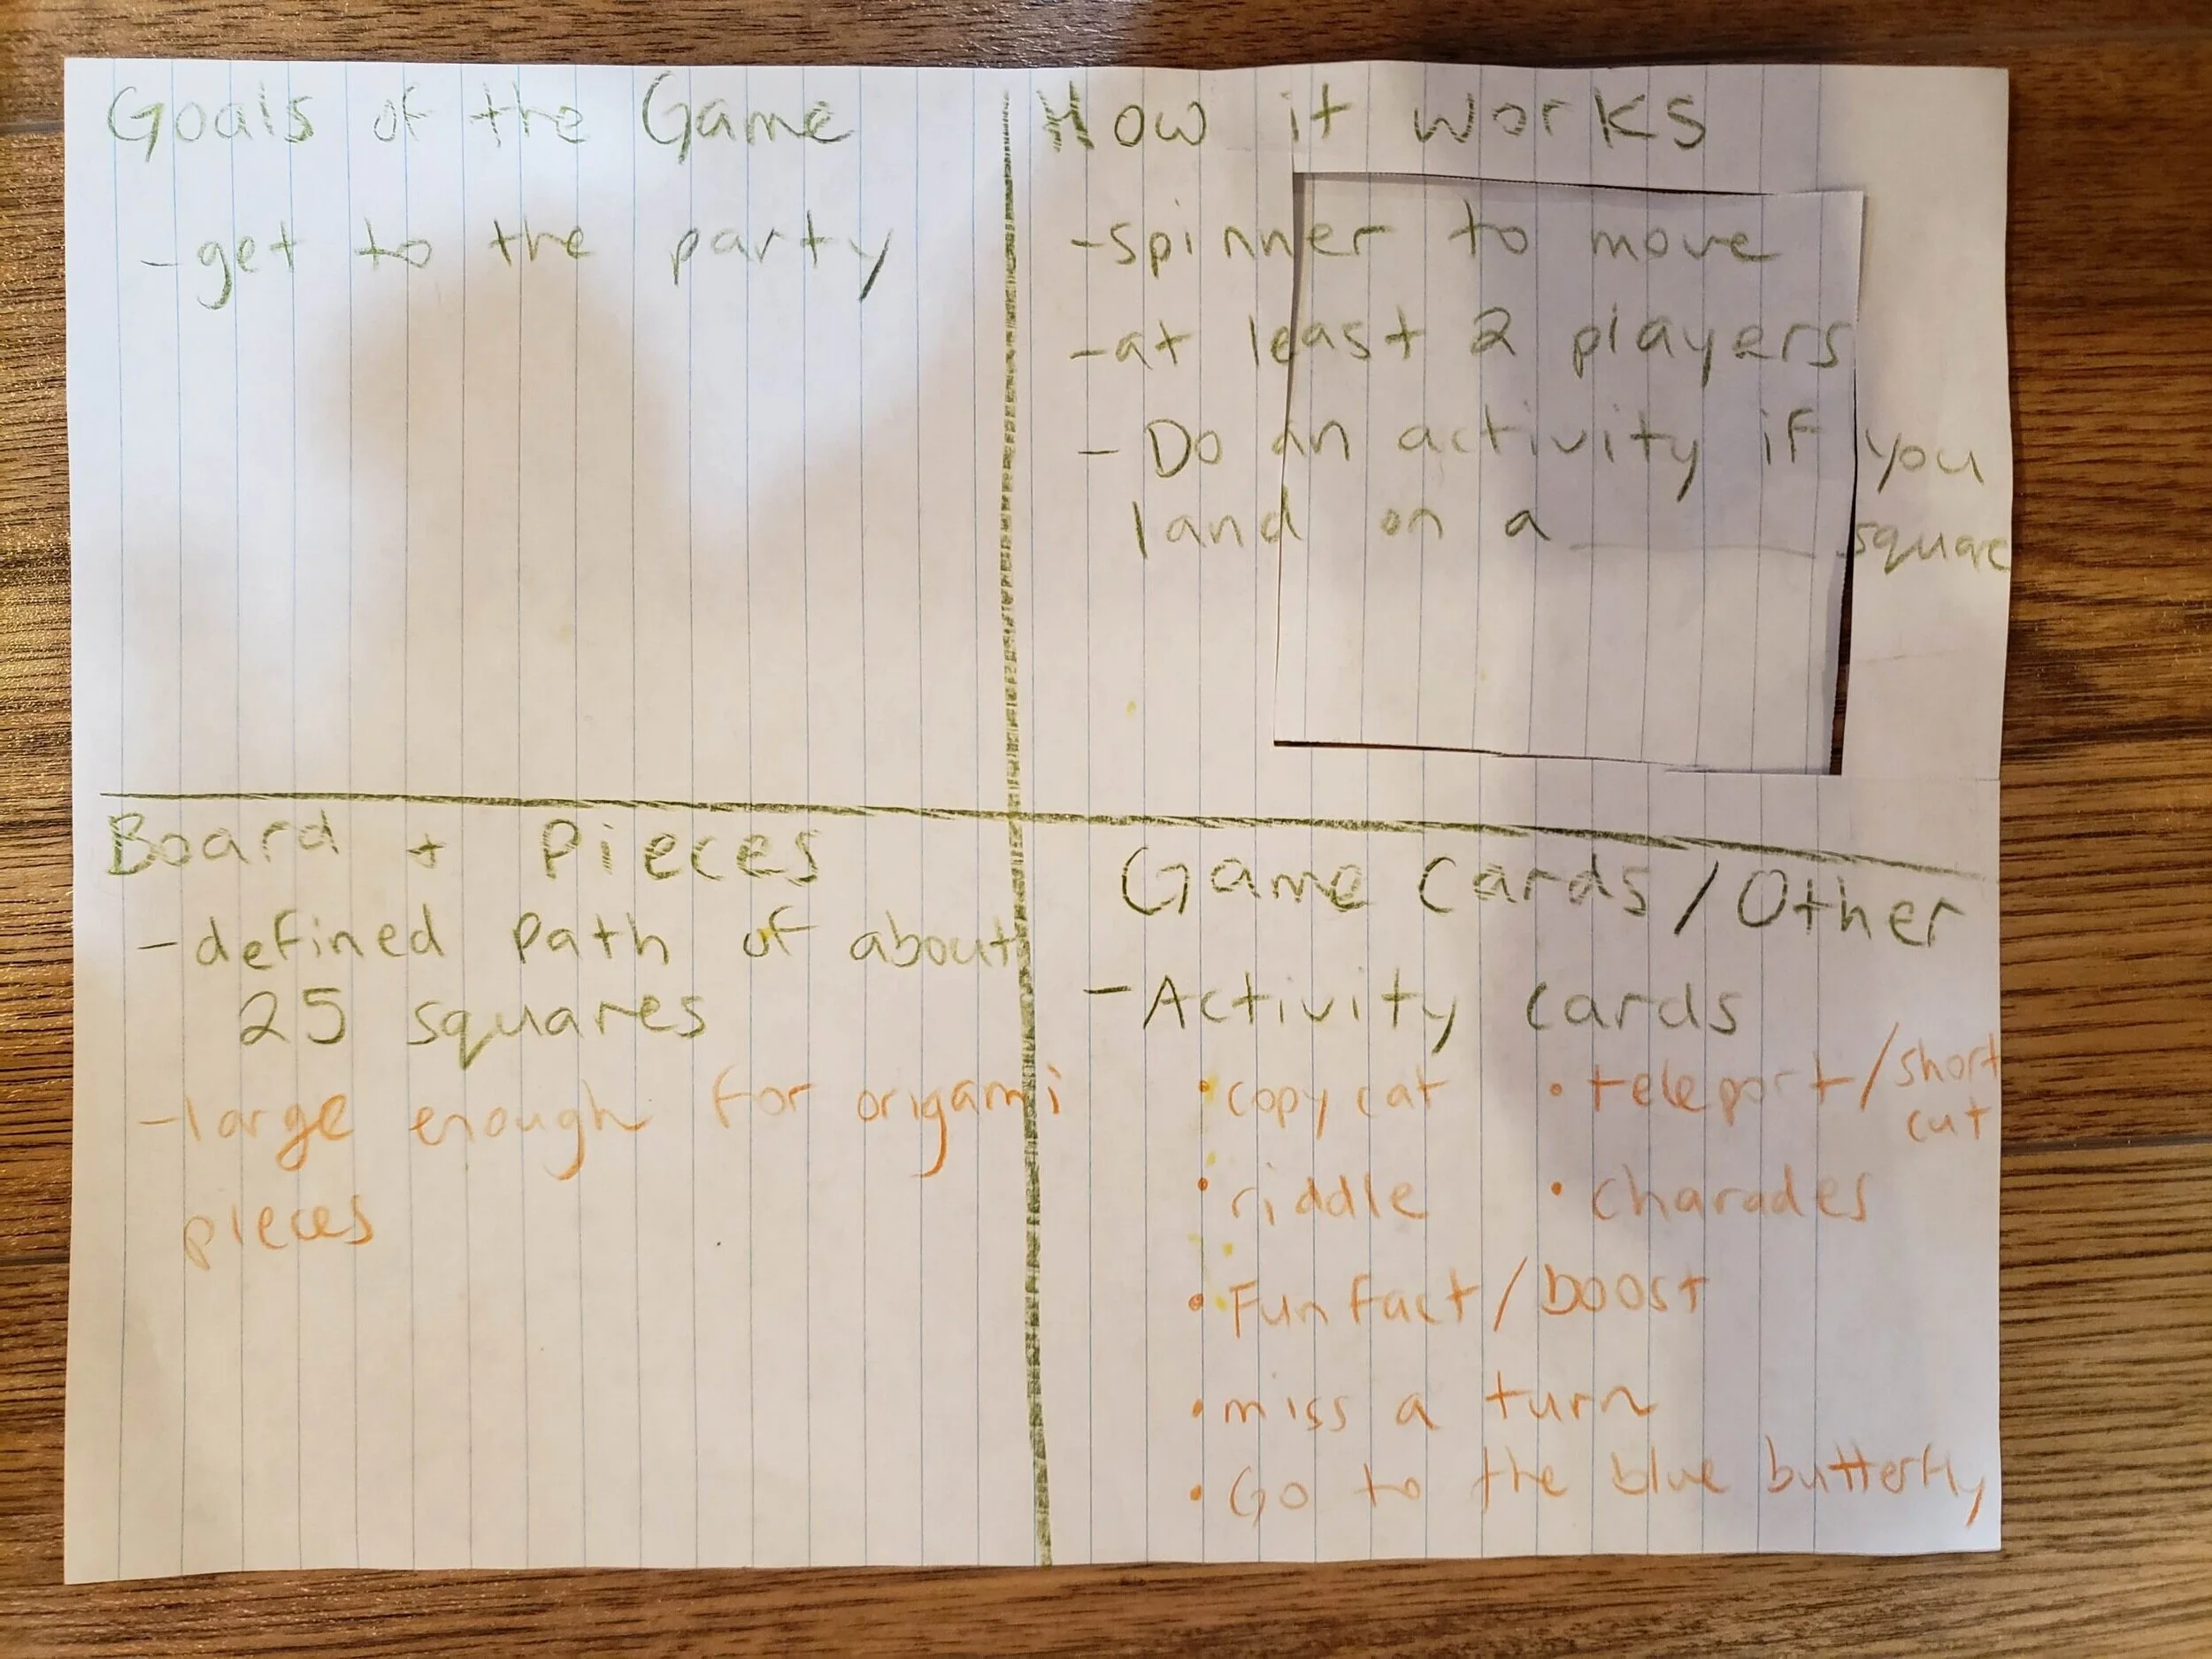
This is the Planning Chart that created Garden Race in later design phases! You can see that the Makers went back and added to this chart after writing their initial ideas (orange writing vs green). They also didn’t use every idea here, and that is totally okay!
Step 5: Game Cards & Other Bits
While you are brainstorming about your theme, goals, game board, player pieces, and mechanics you will probably naturally decide whether your game needs a little something extra to come to life.
Game cards are the easiest way to add fun and make a more interesting, joyful game.
Even if you only want to do a Level 1 Game, creating some simple cards that give players some surprise twists, turns, fun facts or laughs is something we really encourage!
In this stage, making a list of your possible ideas for cards is all you need to do. We will decide which ones and how to make them in the next phase!
Phase 4: make, make, make!
Step 1: The Name of the Game
…
Step 2: The Game Board
…
Step 3: Player Pieces
…
Step 4: Spinners (Optional)
…
Step 5: Game Cards & Other Bits
…
Phase 5: test & play!
This is from Playtest 1 out of 3 of Mountains and Sea. From this test, Phil made some changes to the Spinner and the Rulebook for the game to make the playing experience easier for players!
Step 1: Recruit some players
…
Step 2: Explain the Game
…
Step 3: Encourage Feedback
…
Step 4: Play away!
…
Step 5: discuss & Take some Notes
…
PHASE 6: reflect & make it better!
This process will likely take anywhere from one hour to one day or more depending on how much you want to test, and how much you want to put into improving your game. We recommend you try ONE CYCLE of testing, playing, and making some changes in order to get the most learning and practice using Design Thinking. After that, what you do with your game design is up to you!
Step 1: Review your Playtest Notes & Define New Goals
…
Step 2: Back to Ideation & Planning!
…
Step 3: Back to Prototyping & Making!
…
Step 4: Play Again & Repeat the process as desired!
…
Every Phase: Stay Mindful about your workSpace
Finishing up and Cleaning up
Whenever you finish a task, or a phase, take a minute to look around you and check-in with your workspace
Tidy up anything from the floor, especially tools like scissors, paint brushes, etc.
Look for accidental messes (they happen!) and clean them up. Ask for help if you aren’t sure how to clean something or you can’t find or reach the tools you need
Bringing camp activities home is new for all of us! That includes your parents or guardians. Make sure that you are respecting the space you are working in, your tools, AND the people around you while you are watching, learning, and making away.
Follow any instructions
Be kind
Be a good helper (especially when it comes to tidying up)
Storing Your Game and Pieces
Simple solutions work well! One example is using some of the clips from your kit to secure your game cards and flat pieces.
Rubber bands may also be useful for binding larger pieces together
Use a sandwich or snack bag for small pieces, or look for spare containers in your home that you can use. Make sure to ask permission first!
Want to do more?
here are some tips to help take your game to the next level
Add obstacles or antagonists into the gameplay!
This can be as simple as…
creating game cards that send players back a few spaces when they are drawn
creating a rule that if a player lands on another player they send that player back one square
Or you can use your imagination to bring in a “bad guy”, source of challenge or competition for the players. In our sample gallery you will see these examples and more…
In Garden Race, the makers invented a Butterfly Catcher character that adds some suspense to the game
In The Amazing Space Race, there was an asteroid belt on the game board that players could not pass until they completed a puzzle
Invent mini-games and/or tasks that players have to complete during the game. Some examples of easy games that you can make or find, and add into your own game’s rules include...
Marble maze or Marble Run (like Karissa made for The Amazing Space Race)
Physical challenges like Ring Toss, Ball Toss, or Bean Bag Tosses to score on targets or in containers
Pen and paper activities like Pictionary, or guessing letters in a word
Side-games that you play like Charades, Rock Paper Scissors
Simple visual games that you make or find, like a Matching Game or Puzzle
Building challenges using blocks, Lego, or other things that are easy to put together and take apart
Get creative with how you display and share your instructions
How you do this is up to you! Some possible strategies include:
Create an instruction booklet as a perfect way to practice your printing, creative lettering techniques, and doodles! Maybe you can even bind together a small book to use, and decorate.
Type out your instructions into a word document. Try experimenting with fonts and challenging your technical skills. You can print off your instructions if you’d like.
Go digital like the makers of Garden Race and create a simple Slideshow
Create a unique storage solution!
You can see in our gallery that one way to level up your game in both awesomeness and cleverness is to design a special way to gather all of your creations together and keep them safe and sound.
This might mean designing or modifying a custom box to use, or maybe repurposing a box or container you find around your home.
Mindful Makers Advice
Plan ahead
Planning will make your game more fun! Keep your plan nearby, and make sure you are looking at it every once and a while as you create.
The best games have clear goals and activities. Be mindful of your friends and family that you will want to play with. You want to create a game that you can teach them how to play, so keeping it simple is helpful!
Use your skills!
How can you apply other things you have been learning this week to make your game look or work better?
Maybe Bubble Letters, DIY Stickers, or simple puzzles like a Maze!
Be mindful of your space and keep it tidy along the way
This makes cleaning up easier!
Have a box or bag ready to collect scraps and off-cuts of cardboard and paper, as well as a waste bin nearby for non-recyclable materials
Keep track of your pieces!
Nothing is worse than going to play a game, especially one you work really hard on, and then realizing that you’ve lost pieces!
Mindful Makers DIY Board Game Gallery
Need help getting inspired? Here are some videos and photos of sample games made by makers like you!
Mountains And Sea
a level 3 game by Phil
You may recognize Phil from camp, if you have attended before. This summer he was able to help test our Weeklong project with Karissa and give us this cool sample game.
Phil is an avid board gamer, and he loves maps, strategy, and probability. What better way to combine the things you love than a great new game!
You can read Phil’s rulebook here.
Photo Gallery: Mountains and Sea


Garden Race
A Level 2 Game by Sam & Nate
(featuring some help from our Instructor, Karissa)
Sam and Nate worked together to create a sample board game that would be more fun for younger players or anyone who wants a simpler, joyful playing experience.
They introduced fun activities like imitation or charades, answering riddles, and inventing a team version of their game. They also decided to share their rules in a slideshow.
Photo Gallery: Garden Race


Monster Manor
A level 3 game by Kat
If you have been to camp before and have met Kat, you know that she loves fantasy and strategy games like Dungeons & Dragons! Kat shows us that making changes to improve your game really pays off.
She also was resourceful and used her printer to help make game pieces. She has designed an awesome game full of features. If you are interested, you can view her Rulebook here!
Garden Hop
A level 2 game by Julia
Julia is another Mindful Makers Instructor who loves all things gaming!
She has put together this fun and colourful game with very simple materials like paper, markers, paint and things she found around her house or outside! So fun!
This is also a great example of how simple additions can really up the awesomeness level of a game. Just look at how great Julia’s game cards and seed tokens are!


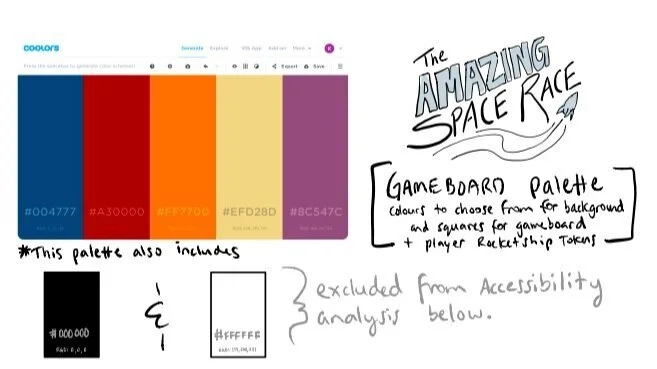
The Amazing Space Race
A game by Karissa & Friends
Karissa actually made this game in the fall for school, and it was so fun that it inspired this entire weeklong project idea!
This game was never quite finished, but you can see some cool strategies like a 3D or pop-up effect, an additional mini-game or obstacle to complete, and using a printer to create quick game cards. You can view the instructions here.
This game prototype had a lot of requirements because it was a school assignment and design challenge, these were things like:
teach the players 25 new facts
be accessible for colourblind individuals
present instructions in 2 languages
and more…
You definitely don’t need to do this, but setting some restrictions or requirements for your own game design is one way to inspire ideas you never would have thought of before!