

AT HOME WITH MINDFUL MAKERS: DAY 3
TIMESTAMP LINKS (view specific segments): Click play then the view on Youtube icon.
VIEW IN HD 1080P QUALITY: Click play, then check the settings icon, then quality in the video viewer.
TO SPEED UP THE VIDEO: Click play, then the settings icon, and select playback speed x 2.


Today’s Projects Are:
Tie-Dye
There’s nothing more exciting than the moment you open up the folds and twists of a textile that has been tie-dyed to discover the patterns and colours within! It’s a thrill that will never grow old.
In this kit we’ll be tie-dyeing our own colourful yarn and two handy dandy bandanas. The yarn will be used in our Day 4 activity of weaving a tapestry, so it’s important to follow the order of days for this project.
There will be enough dye left over for you to dye some additional items like a t-shirt or socks or a tote bag. As long as the article is 100% cotton you can dye it (check the tag)! If you bought a new piece of clothing for this activity, make sure you wash it in a machine before use. During the manufacturing process, an additive called sizing is added to the textile to make the fabric stronger. This will interfere with the dye, and your colours won’t “stick” as well to the fabric. The bandanas included in your kit have been pre-washed.


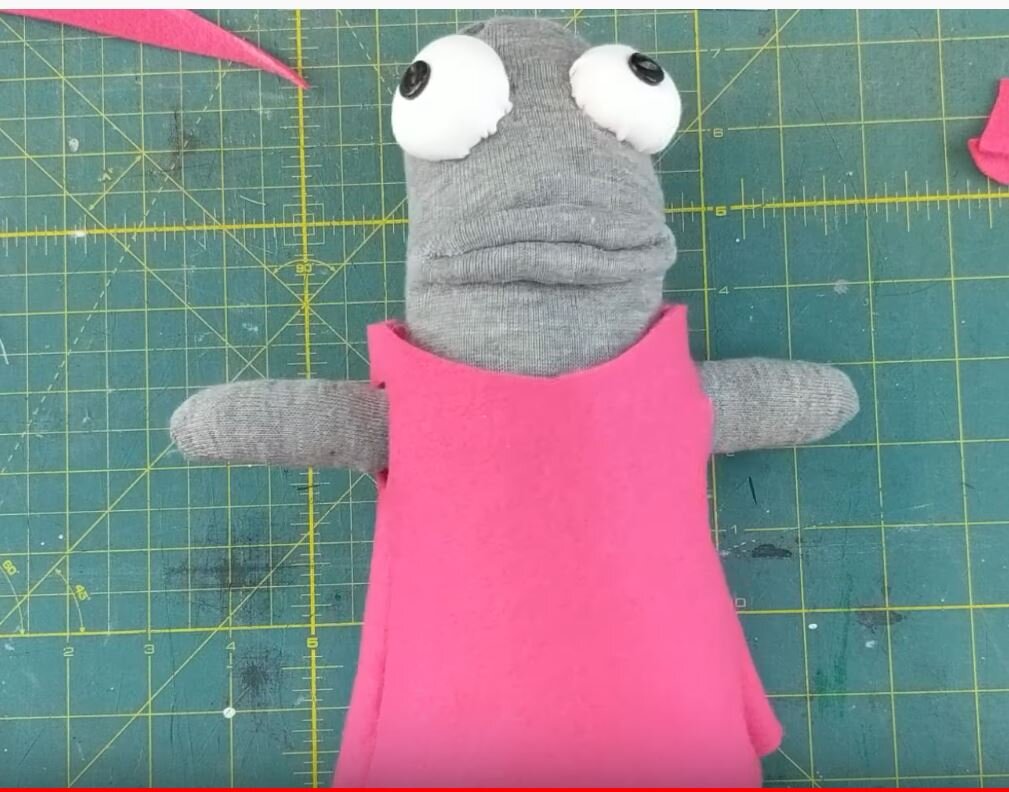
Sewing a silly sock buddy
We can confidently say, after bearing witness to the creation of sock buddies at camp, that using socks in this way can certainly bring about a lot more joy than if you were to just stick them on your feet. You’ve got the fixings to create a one-of-a-kind super squishable sock toy to call your very own.
The only thing that makes a sock buddy more fun, is getting to dress it up. Yes, we have designed costume patterns you can follow to fit your cuddly new friend.
Please remember that sewing is a mindful activity. You need to take your time and focus on each stitch you make. If you are distracted or feeling frustrated, it’s okay to take a break! Come back to it when you feel ready. Stitches can always be undone. Your sock buddy will love you even more for the care you take when bringing it to life.
Yes, we know we gave you a hot glue gun in this kit, but please don’t be tempted to use it on your sock buddy. This project is designed for you to develop this very handy skill, and hot glue on fabric is permanent. Save it for when you create that epic cardboard playhouse for your toy.


Additional resources…
We’ve added reminders for the difficulty levels (1,2,3) which we’ve categorized each costume pattern into. With practice you will be able to build your skills and challenge yourself to make more awesome sewing projects. We hope you enjoy sewing your sock buddy as much as we did!


Closing Up Your Sock buddy Head
Time Stamps (in the video at the top of this page):
Advanced - rounded head: begins at 1:02:20
Beginner - flat sock head: begins at 1:14:15
Costume Pattern Videos
We’ve filmed videos of each pattern in your kit being sewn in real time. You can can craft-along to these along with us, or play them sped up (use the player settings) if you want to view them quicker.
Some of these videos do not have audio instructions, as they are just meant to be a visual aid.
Happy sewing!
Features: Lips, Eyes, Ears, arms
puffy lips - Level 3
Use a gather and pucker technique to give your sock buddy a quirky smile.

Flat eye - Level 1
Use felt and buttons to create a simple set of flat eyes.

puffy eye - level 2
Use the rectangle of t-shirt material from your kit to create this "puffy eye” look. You can use this technique for making other decorations too. It works best with stretchy materials like socks and t-shirts.

Arms - Level 1
Use the sock off cut to create 2 arms for your buddy.

Ears - Level 2
Use the sock off cut and some felt to create 2 ears for your sock buddy. Please note: if you already used your sock off cut to make arms, you can use all felt pieces for the ears (or you might have a lonely sock at home that could be re-purposed).

COSTUMES
Level 1 - Crown
Embellish your crown with buttons before assembling to give it that extra pizazz!

Level 1 - Mask & cape
Super Sock Buddy is not complete without a mask and cape. You’ll need some elastic bands for this costume.

Level 1 - belt
A simple belt can be used to accessorize many costumes.

Level 1 - Neck Kerchief
This kerchief pairs well with the Overalls costume piece. It doesn’t actually require any sewing, but you can embellish it with buttons or decorative stitching if you like!

Level 2 - Beanie Hat
This is a versatile hat which you can further embellish with a pom pom for a wintry look. If you sock buddy has ears, you can cut small slits to fit them through.

Level 2- Apron
Give your sock buddy an apron to keep them clean when getting into all sorts of maker messes.

Level 2 -Shirt (without Sleeves)
Level 3 - shirt (with sleeves)
This costume works best for buddies that have arms! Modify this pattern into a vest by cutting a slit up the front piece once sewn.

Level 2 - Dress (without sleeves)
Level 3 - Dress (with sleeves)
This is basically the same construction as the shirt, just longer for full coverage. Plan out your cuts as this will take up a full sheet of craft felt.
The Robe video below shows a better layout for your dress patterns.
See shirt video above for how to add the sleeves.
Level 3 - Sun Hat
Protect your sock buddy from the sun with this handy dandy hat! To keep it from falling off as you play you can secure it with a couple safety pins (not included).

level 3 - overalls
Complete the farm-life look with a pair of overalls.

Level 1 - Just the hat cone piece
Level 3- Wizard Hat
Did you know your sock buddy has magical powers? Give them a costume to look the part!

Level 3 - Robe with Hood
Complete your wizard school uniform look with a robe in matching house colours.
The robe tutorial uses the same pattern used in the dress, so you can skip ahead to 9 mins in the video to see the hood being made. This pattern also uses the slanted sleeve pattern. You can create an open front robe by cutting a slit up the front after completing your sewing.
