
Week 48
diy stamps
Welcome to week forty-eight of your Smash Book. Today, you will be using organic materials to create stamps!
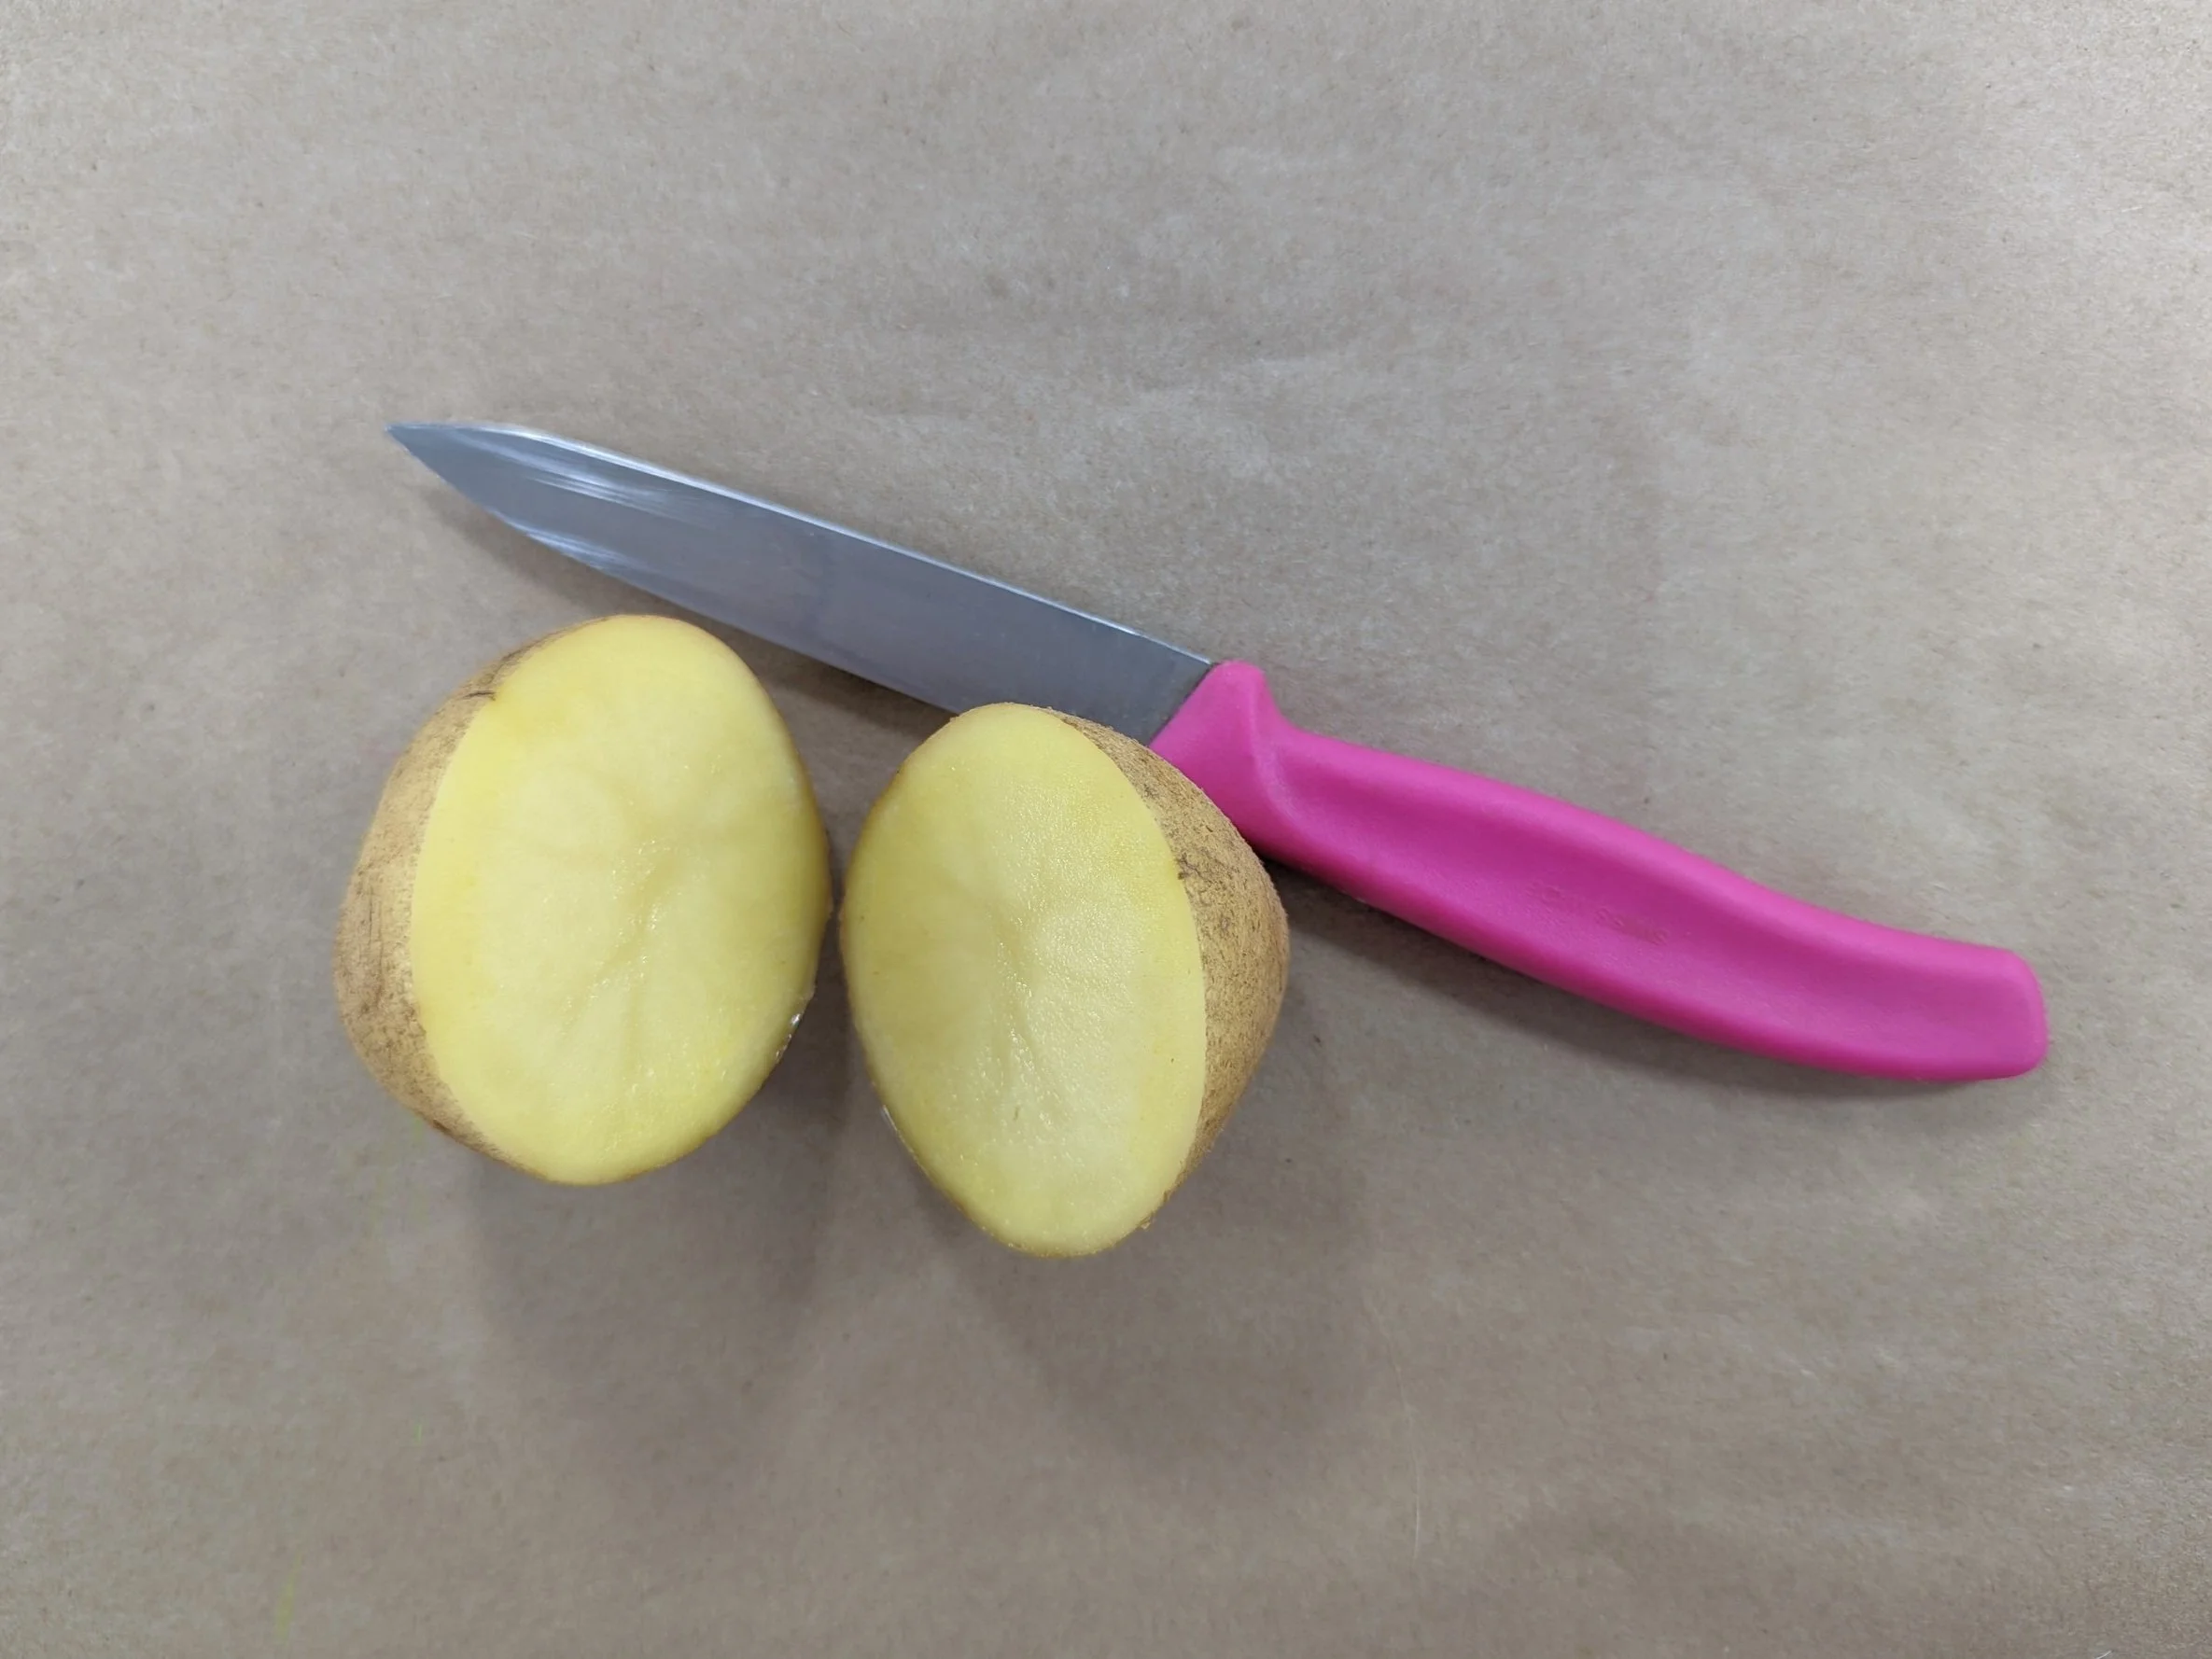
Step 1. First, gather your stamp making materials. Potatoes will work best as they are soft and easy to carve, but other fruits or vegetables such as apples or carrots will work as well.
Step 2. Using a knife (ask an adult for help), cut the potato in half. Each potato will create two stamps!
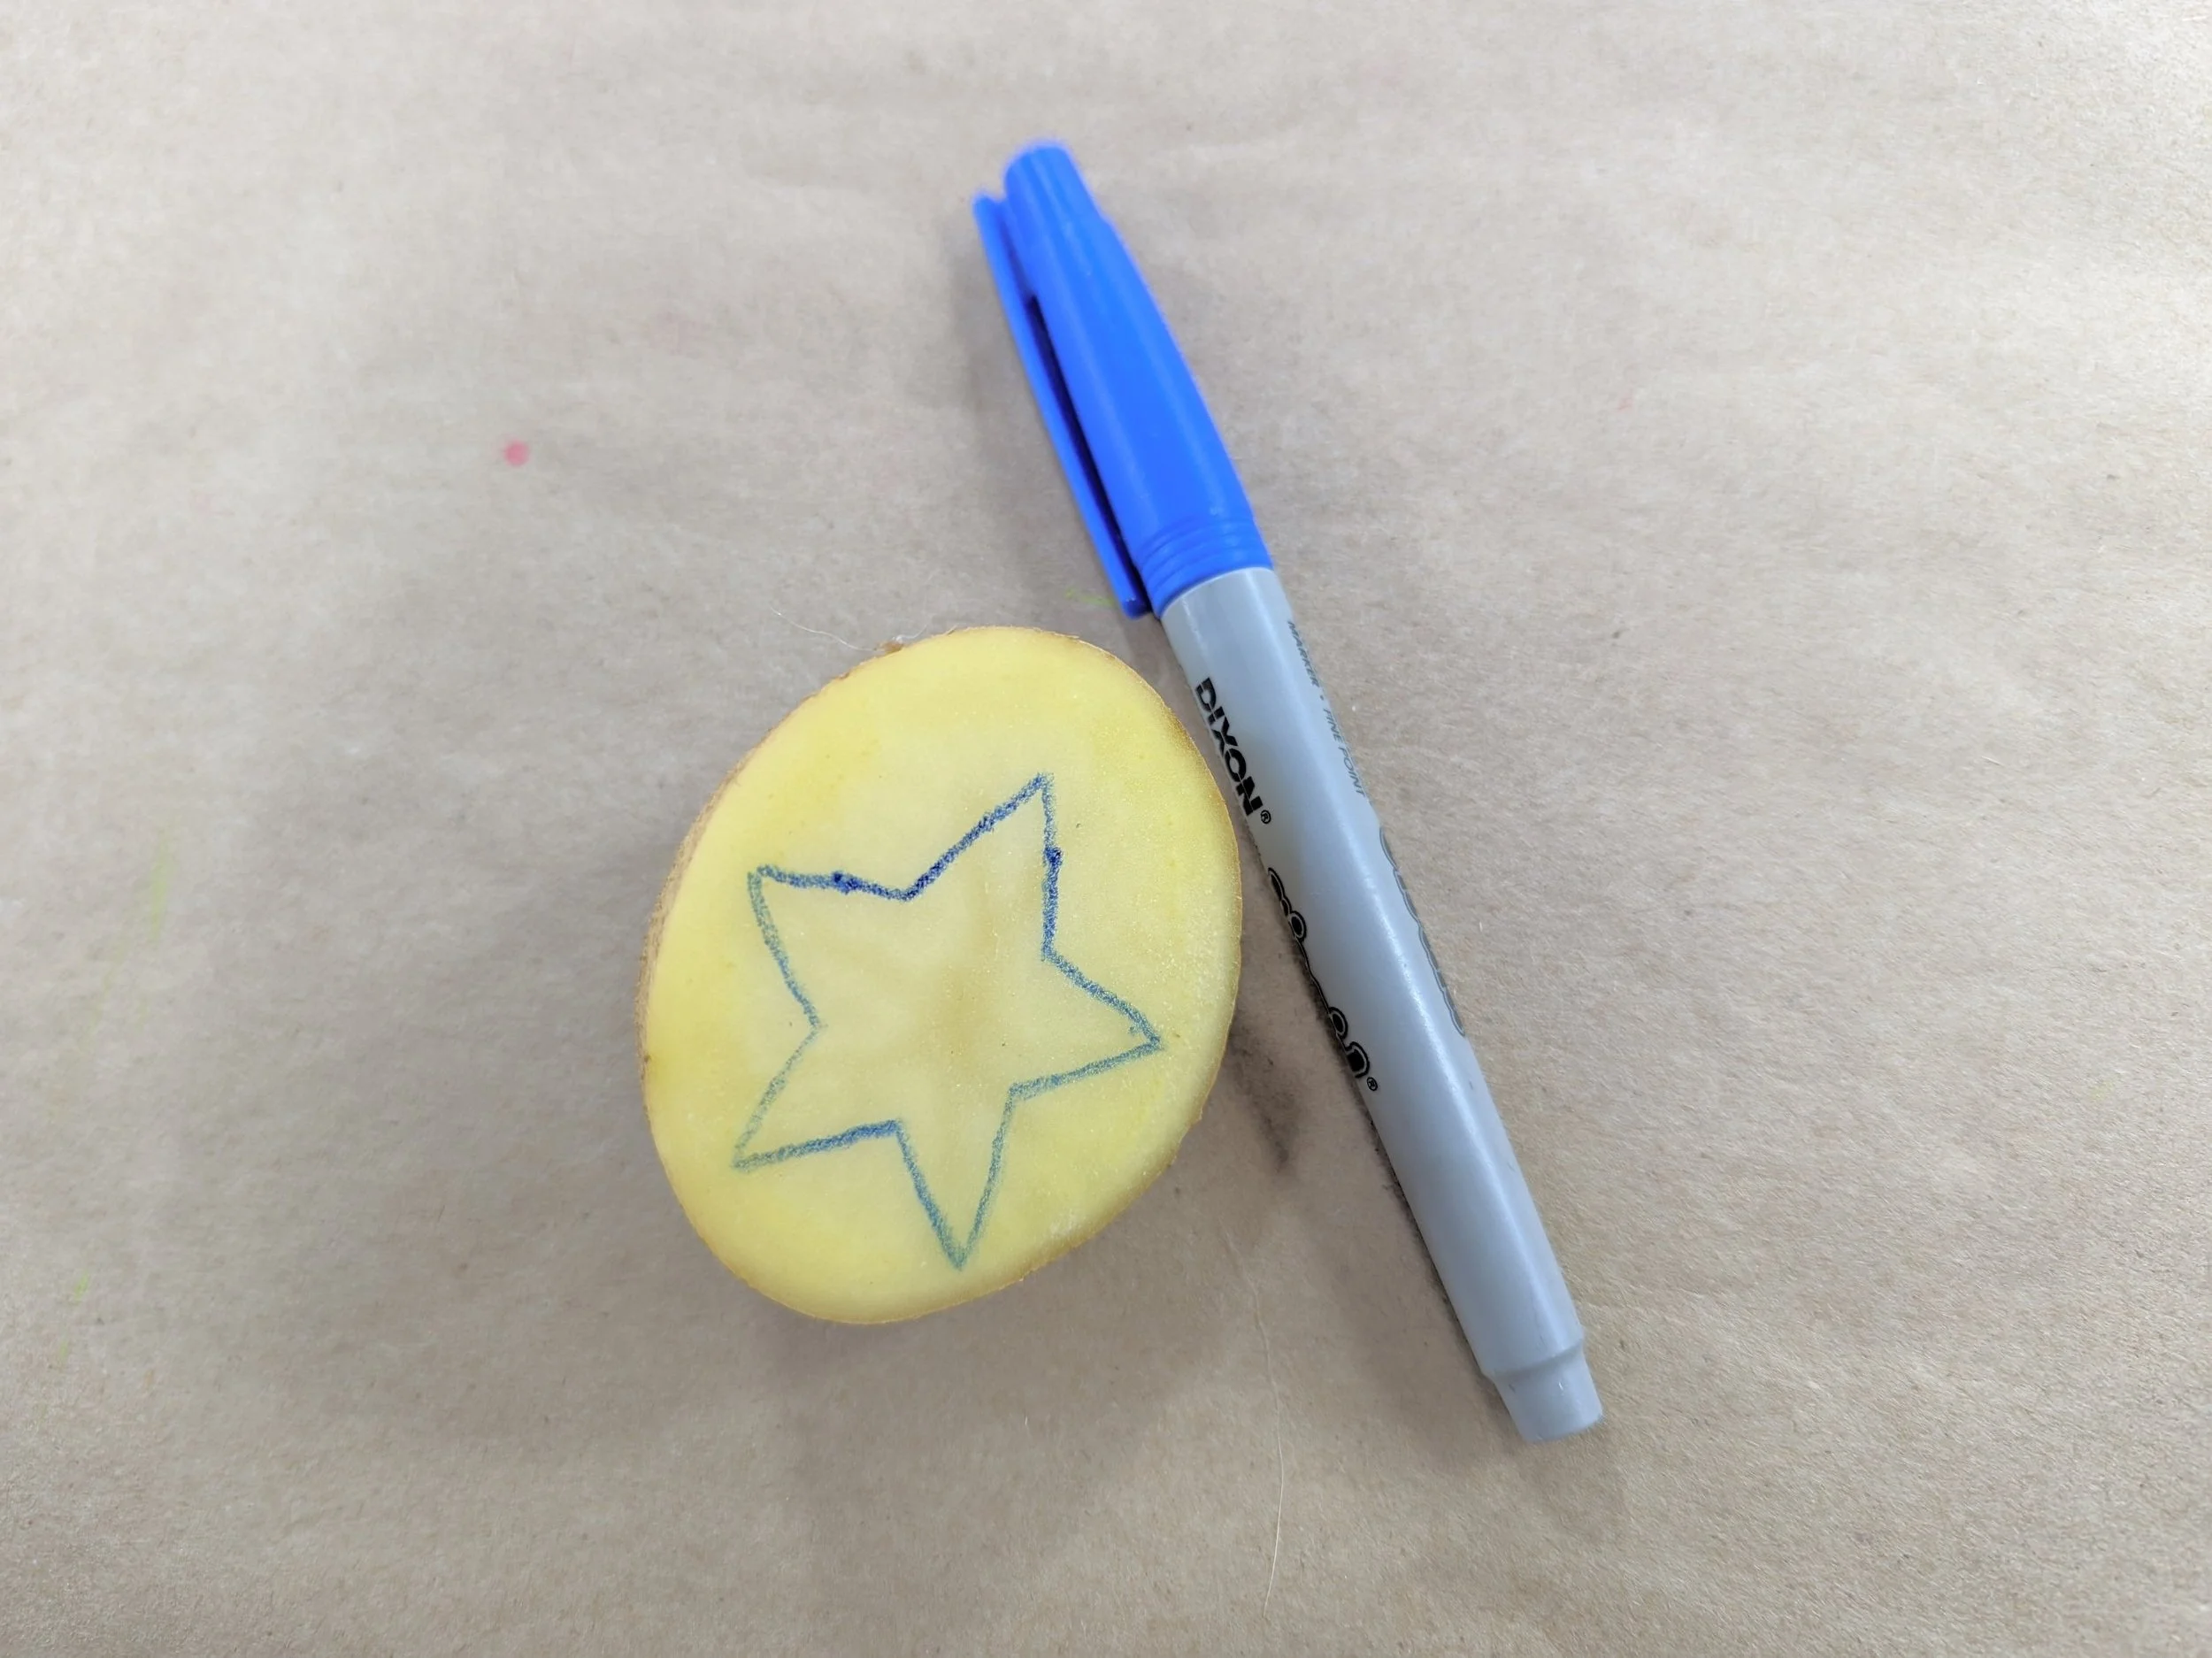
Step 3. Use a marker to draw the shape you want your stamp to be on the sliced surface of the potato. Then, using a small knife, carefully cut along the lines and carve away the excess potato flesh.

Step 4. Create more stamps! Very complex ones may be difficult to carve, but simple shapes or letters are easy to make.


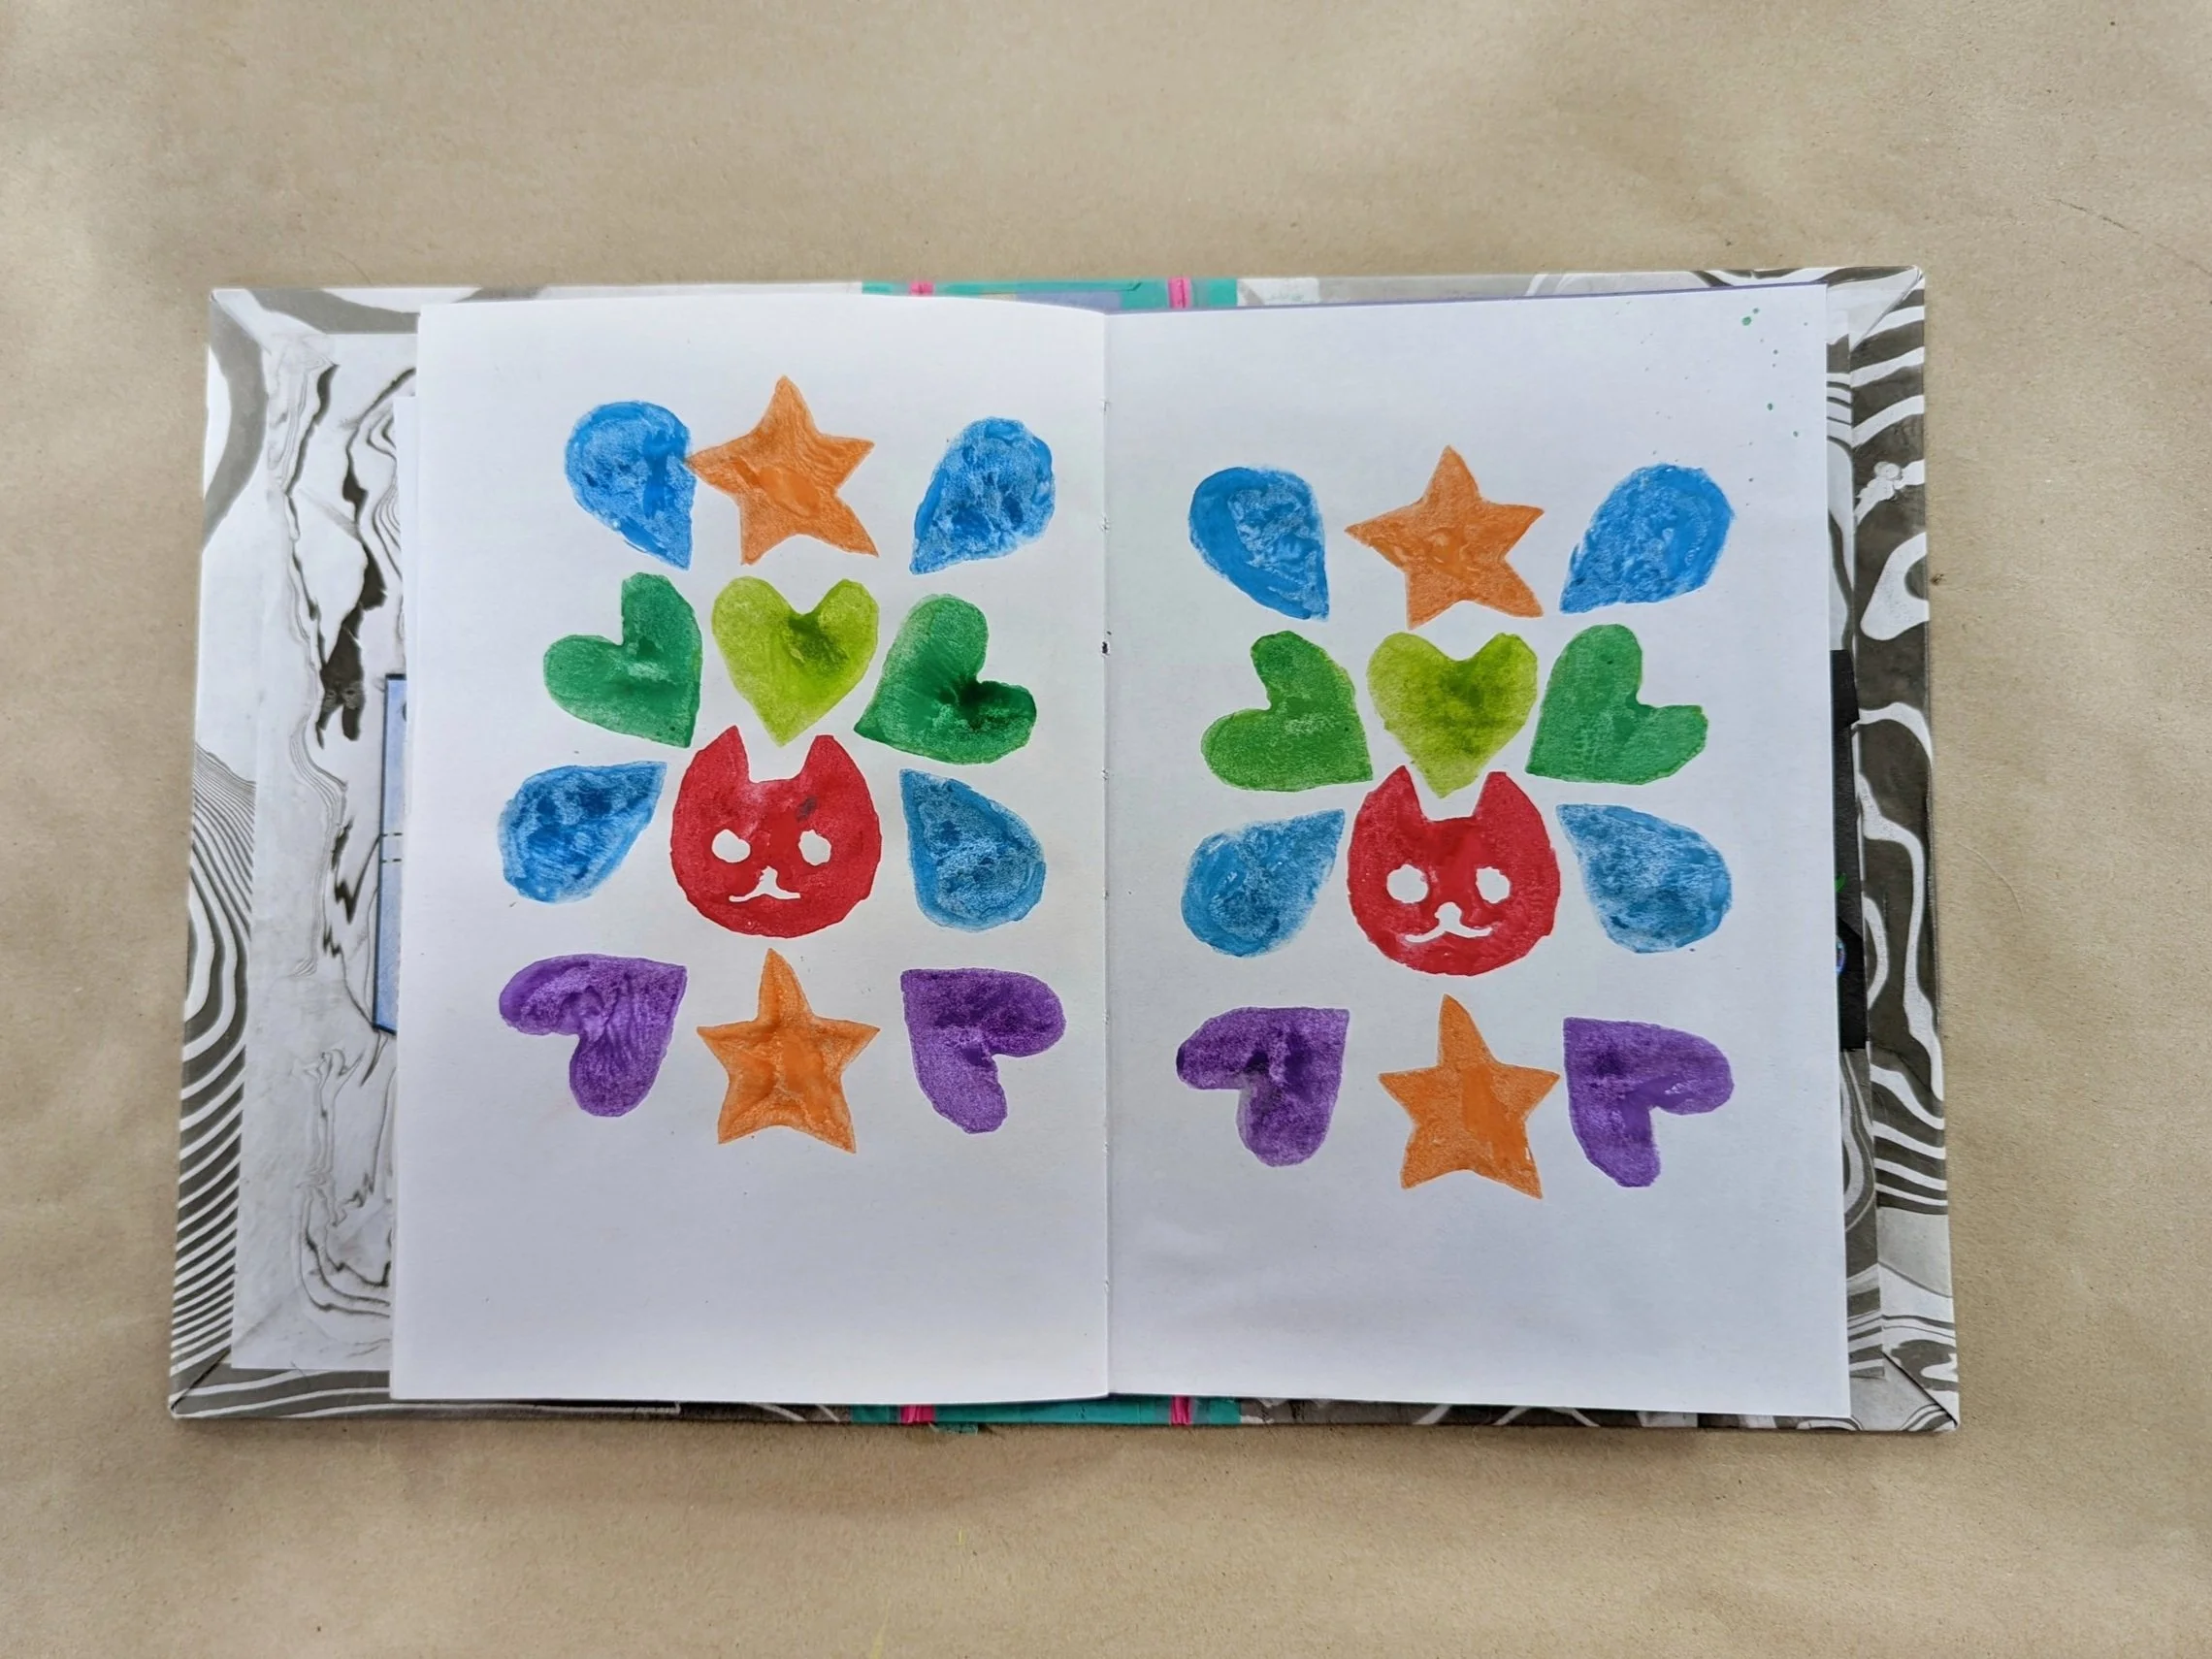
Step 5. Now, you can create some art using your stamps inside your Smash Book! Using a paintbrush, add a thin layer of paint onto the surface of your stamp design. Then, turn your stamp onto a piece of paper and press firmly to transfer the paint. To switch to a different colour of paint, simply rinse your stamp under the tap and dry it gently with a towel.
Project Idea
Try using your stamps to make your own gift wrap paper or holiday cards! Here’s an example of how we made a “string of lights” themed paper using the same stamp with 3 different colours of paint. We used a black marker to connect the light bulbs.


Connect with you fellow Club Members in our Virtual Google Classroom Space. Click here to join!
Share photos of your finished pages for a chance to win special prizes in our Monthly Prize draw!